At this point I've made more headphone cables than I care to count, and in my last post there was a request to document the procedure. So while it's fairly straightforward, here's my process - by no means the process, but I've learned a few nifty tricks here and there I thought I might share.
=== Tools ===
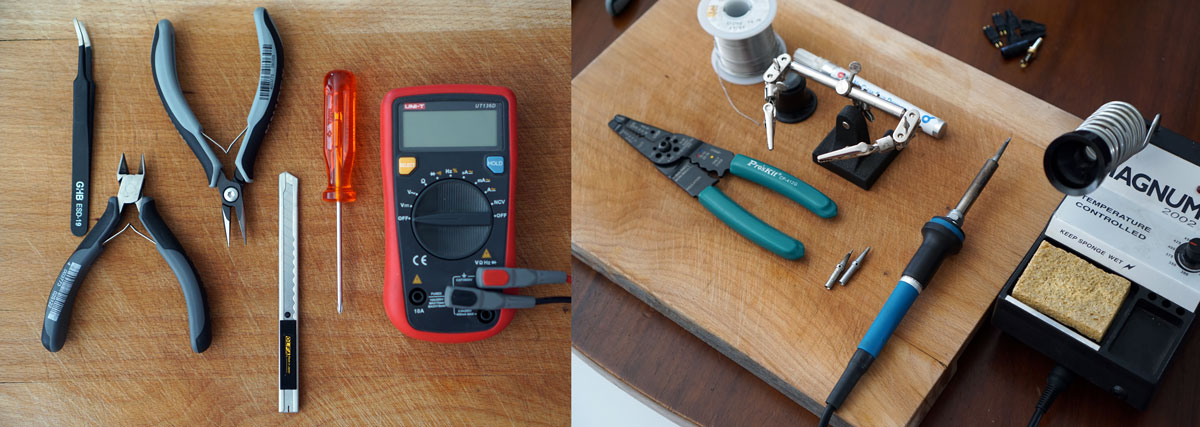
Gear up! My cable kit consists of the following:
=== Consumables ===
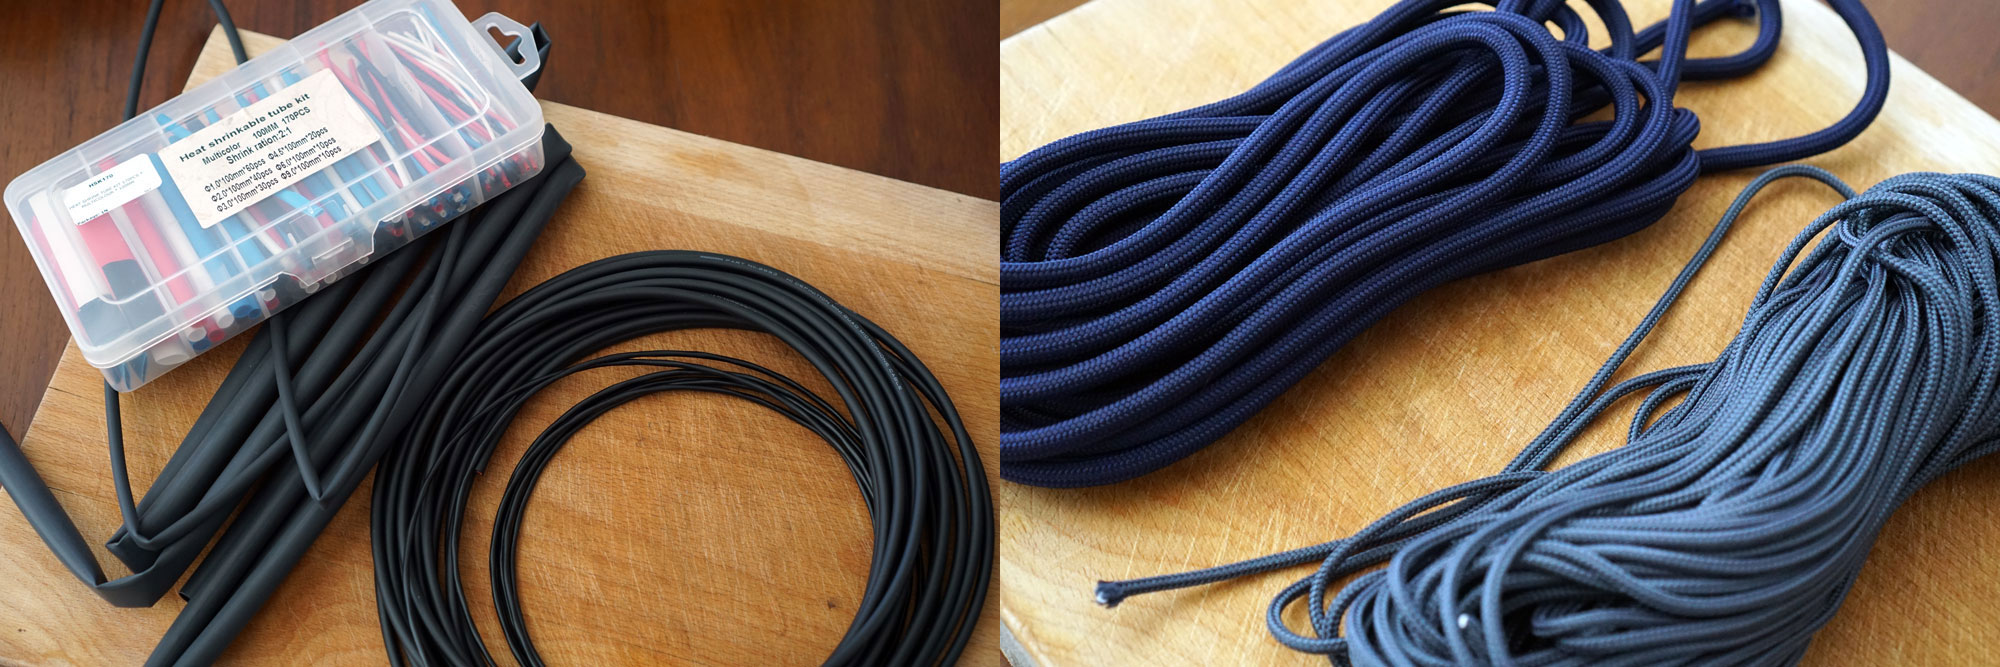
- Wire -
You're going to need some suitable wire for both the main length of the cable (from the audio jack to the Y-split) and from the Y-split to the headphone connector(s).
This can either be two different gauges/core counts - for instance, a 4-core thicker cable for the main length and two thinner 2-core cables to the headphones. Or it can be "IEM" style, with 4 single core wires wrapped/braided together which eventually branch off at the Y-split to the headphones.
My aim is always "needless levels of durability", so I prefer the first method.
Cables can be hard to select, with esoteric product codes and a bewildering number of choices. However, there's no point going through the trials and tribulations of DIY cable assembly if you're going to use whatever crappy Scooby Doo wire you have lying around. I suggest sticking to high-quality brands - Mogami, Gotham, Canare or (if you're swimming in cash) Cardas. Locally, they're all pretty tough to come by - but our main man Design By Max (www.designbymax.co.za) can hook you up.
I've tried a load of Mogami cables, here's my preferred lineup:
Mogami 2534 (4 cores + shield), 6mm dia. (Balanced)
Mogami 2893 (4 cores + shield), 4.8mm dia. (Balanced)
Mogami 2549 (2 cores + shield), 6mm dia. (SE)
Mogami 2552 (2 cores + shield), 5mm dia. (SE)
Mogami 2944 (2 cores + shield), 2.5mm dia. UGLY! (SE)
Mogami 2912 (1 core) 0.85mm, flexible jacket.
Mogami 2680 (1 core) 0.60mm, flexible jacket.
Notes:
1. 6mm is thick. That's going to be a chunky cable. For me, perfect.
2. Although certainly thicker than Chinese IEM cable wiring, the 2912 and 2680 make great braided-then-split style cables. These can then be sleeved or left as-is.
3. The 2944 makes a good, thinner split-to-headphones cable, but the thin outer insulation means it's fairly ugly - use only if you plan on being a sucker for punishment and doing some cable sleeving.
4. I'm a sucker for punishment - for this cable, I used 2893 for the main length and 2944 for the split-to-cans wires.
- Sleeving -
Clean presentation comes in three parts: heatshrink, sleeving and Y-split.
1. Heatshrink
Heatshrink is needed to insulate wires and (assuming it is adhesive-lined) form a good looking Y-split and add an extra seal to fiddly connectors. A cheap, non-adhesive pack of 2:1 or 3:1 heatshrink in a variety of sizes is useful to insulate wires (try Communica or the like). I'd also suggest splurging on some brand-name, adhesive 3:1 or 4:1 heatshrink to sleeve connectors and splits. Try 3M or TE brand - RS electronics is likely your best best. Get something with a 15mm diameter or more to ensure you can slip it over a completed assembly without having to desolder anything.
2. Sleeving
You can either sleeve your final assembly with some plastic sleeving or go FULL CABLE NERD and get some legit fabric Paracord. Or leave it bare.
Paracord is not cheap, and almost impossible to find in decent sizes in South Africa. I get mine in big batches from Amazon in a variety of diameters and colours.
TIP! Aim to get Paracord with a diameter of ~1-1.5mm larger than the cable you intend to sleeve. Any larger and the sleeve will look and feel butt ugly. Any smaller and you will simply not be able to thread it over the cable.
3. Y-splits
The eternal dilemma. How to get a neat cable split, that leaves the cable light enough suspended from your head but robust enough to protect the join? Not easy, and this is by far the hardest part to get right. There are loads of options.
You can buy some premade plastic Y-splitters on Aliexpress (search terms should include "split", "boot" and "pants" - not kidding). These are bizarrely expensive for little pieces of Chineseum petroleum byproduct, however. And they'll take 4 months to arrive by SAPO.
Of course you can use heatshrink. There is a real art to doing this well - you need at least 4:1, top-quality adhesive heatshrink and very good control of a heatgun. This can either be a simple sleeve (see my post https://www.avforums.co.za/index.php/topic,76456.msg897186.html#msg897186) or using some needle-nose pliers and gradual heat you can slowly shape the heatshrink into a nifty Y-shape (see https://www.avforums.co.za/index.php/topic,76456.msg896452.html#msg896452).
Lastly, you can use some external piece of hardware to ensure a perfectly smooth, simple heatshrink seal with no lumps or imperfections. The trick is to find a small metal or plastic cylinder that just fits over the assembly/split. I recently hit on the idea of using the metal case from a 3.5mm TRS jack, which is the method I use here.
Lastly, if you're going for the braided "IEM" style cable route, you can be a lot less troubled by the Y-split, as no solder join in the middle will be required. The split can be sealed by a dollop of hot glue and covered by some heatshrink to good effect.
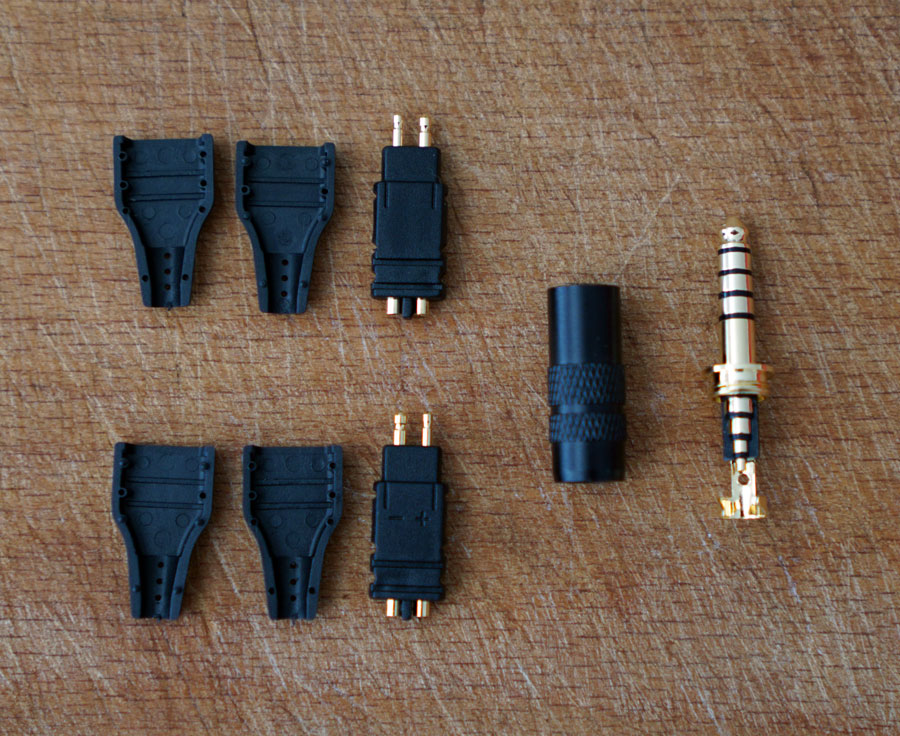
And of course, you need some connectors, ones that attach to the cans and one for the business end of the cable, be it 3.5mm TRS, a 4-pin balanced XLR or a god-awful 2.5mm Fiio-standard TRRS. Whatever you need.
For 3.5mm or XLR cables I recommend Neutrik or Amphenol connectors. Amphenol is easier to work with, with better strain relief (IMO), but Neutrik is a more audiophile-approved brand name.
For others, Mouser, Digikey or Aliexpress are your best bet. These are also good places to get the connectors for the cans themselves - Reen mini-xlrs for Audeze, or MMCX connectors for many IEMS, or 2.5mm or 3.5mm balanced connectors, brand depending.
I'm making a balanced cable for my Senny HD660s. Specifically, I'm obsessed with the 4.4mm balanced connector ("Pentaconn" or "Sony Balanced"), which in my humble opinion should be the standard for portable balanced gear. The HD660 actually includes a 4.4mm cable in the box, but it is ludicrously long, which for a portable device is just annoying. Also, I want a sexy blue Paracord cable
(I've used literally every variety of DIY Sennheiser HD6XX connector, from Cardas to the cheap Aliexpress ones. The best option by far is to sacrifice one of your official Sennheiser cables and snip them off at the Y-split. That way, you get two perfectly sized cables with connectors pre-attached. And they are simply the best quality. In this case, I'm using some decent DIY ones from China, which I honestly find much easier to work with than the expensive ones from 6moons and the like. YMMV.)
=== Process ===
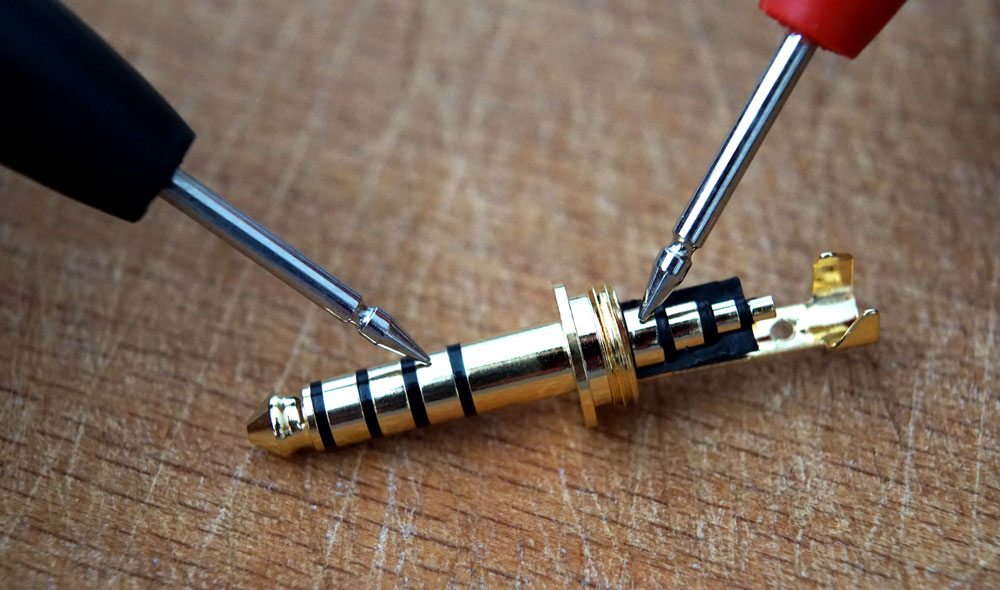
Continuity test your connectors! And write down which contact refers to which pin, either Left, Right or Ground for SE cables or L+, L-, R+ and R- for balanced.
This incredible article from diyAudio has a beautiful list of the most common connectors and their pinouts as they relate to audio. Lovely:
http://www.diyaudioblog.com/2016/02/headphone-connectors-pins-pinouts-for.html
Nevertheless, write down which pin is which. You won't regret it. Do this for all your connectors.
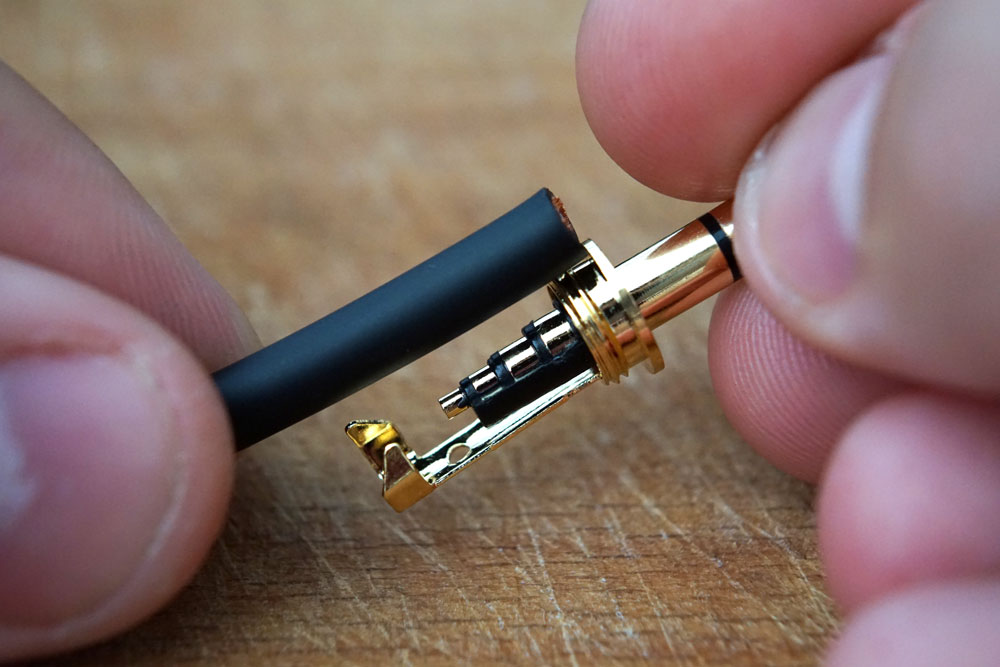
Cut your main cable to length. When in doubt, 1.8m is a good compromise between portability, length and hassle.
Line one end of the cable up against your terminal connector and mark where you need to strip the insulation.
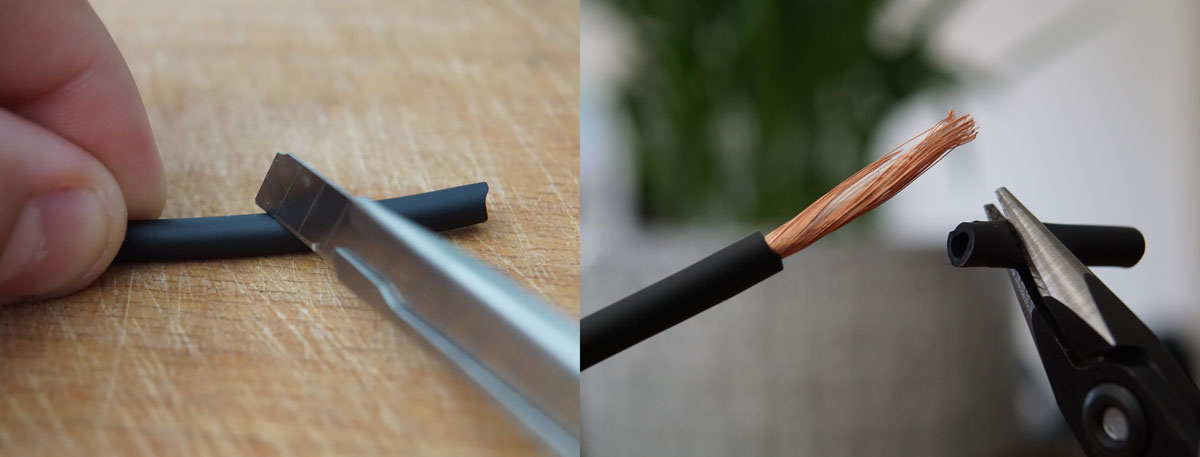
If the insulation is very thick, carefully score it with a knife before using side cutters/pliers to strip it off. If you took off any shield wires, cut it back and try again. (On a balanced cable, the shield wires are slightly less important - they don't form the ground - but may as well do it right )
)
Only strip one side for now!
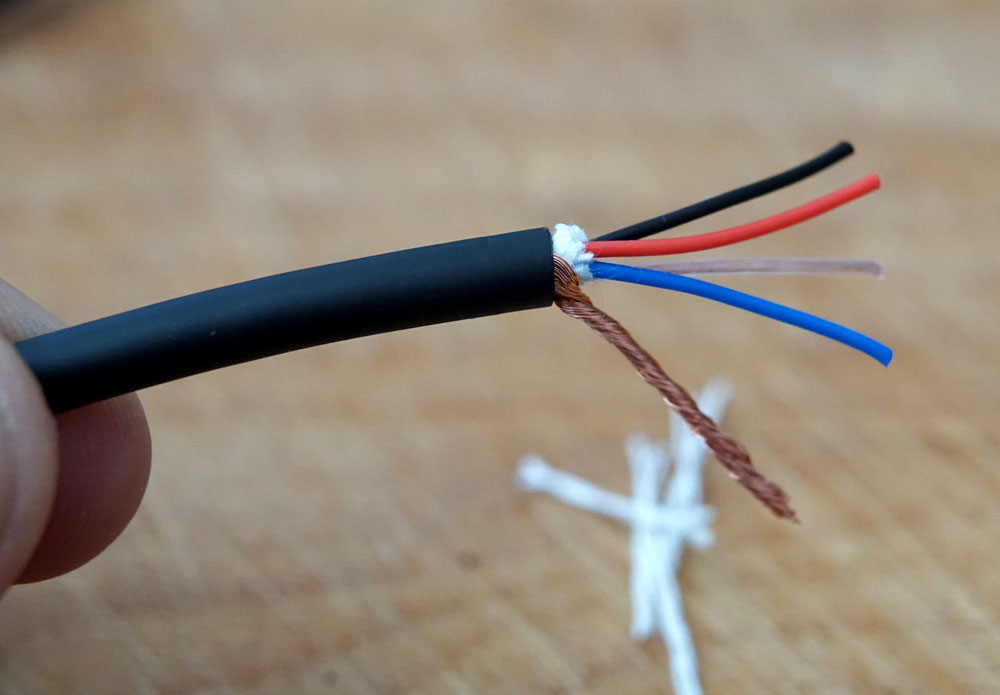
Cut away any strain-relief or lead material (the fabric/plastic, non-conductive strands inside the cable). Untwist and isolate the individual wires, and neatly twist the bare shield wires together.
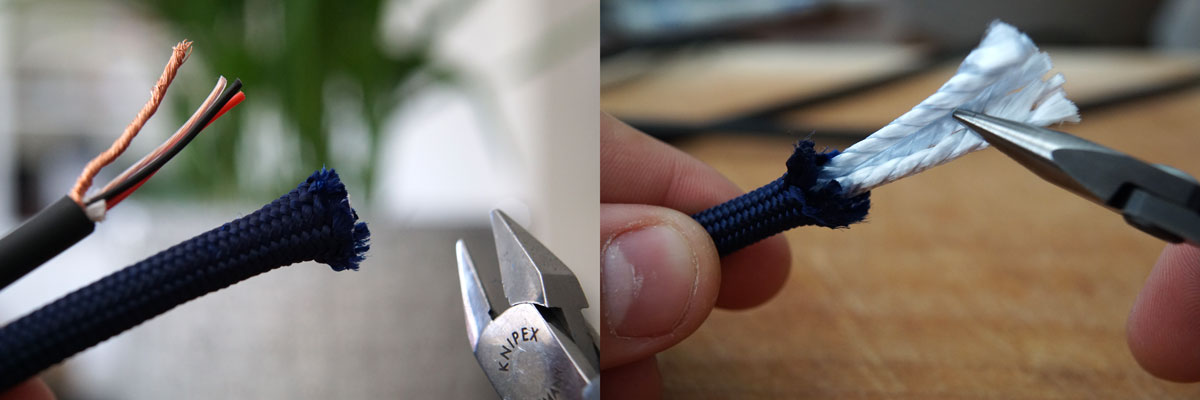
While we're at it, cut the larger diameter Paracord slightly longer than the main cable length - it tends to shrink in length once it's been sleeved onto the cable.
Carefully, using some needle-nose pliers, remove the inner strands of the Paracord. Feel free to throw them away, or let the cat play with them.
TIP! Don't buy "coreless" Paracord. They ship it flattened - so the nice, cylindrical shape is lost - which makes it a nightmare to snake into the cable. Rather used regular Paracord and gut it.
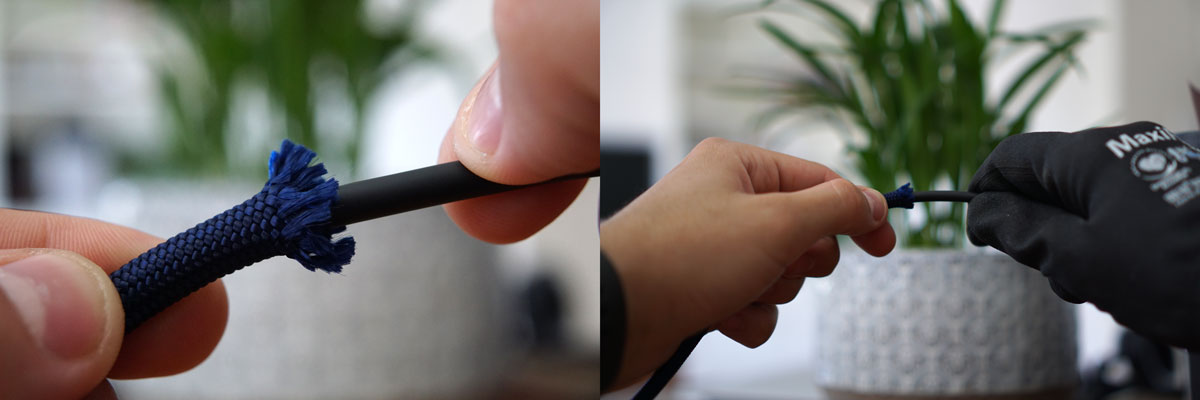
Get ready to stay patient. Your first few times snaking Paracord onto a cable are going to be lessons in humility, that's for sure. The first few centimetres will go on easily, and thereafter friction becomes your enemy, meaning you'll be working it on millimeter by painstaking millimeter. With a long cable it becomes tough to determine whether you're actually making any progress, but a constant "bunch with your off-hand hand, and pull with your dominant hand" motion is the key and becomes muscle-memory after a few tries.
TIP! Get a work glove for your dominant hand. You absolutely will get cocky at some point and give yourself rope burn. In addition, a glove makes the process a little quicker, as you can apply decent force without mangling your palm.
When the cable is fully Paracorded, stretch the cord out as much as possible over the insulation to get a nice, seamless fit. You shouldn't be able to rotate the Paracord around the cable. If you can, you likely picked too wide a cord. Oops!
At this point, back the Paracord off by a few centimeters and strip the individual conductors. For each, twist the copper wires neatly together and tin them with a dash of solder.
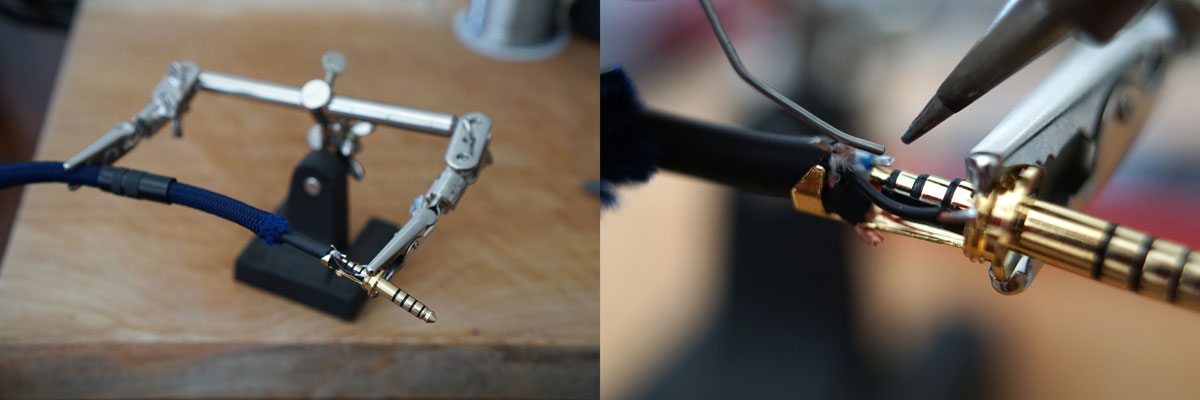
Solder time! Line up your cord in some Helping Hands - cord on one side and the connector on the other. Tweezers come in handy here to line up a wire to a conductor on the connector. Using the ole' "nudge the solder wire with your pinky trick", you should have the 5 necessary hands to complete this without much fuss.
Connectors like TRS jacks have plastic insulation barriers between the conductors. A quick, "in-then-back-away" motion with the soldering iron is necessary to prevent these from melting. Flux if you need to, and use leaded solder.
Keep all the solder joints as bunched around the connector as possible - large joints flailing about the connector is going to make it hard (or impossible) to slide the housing around afterwards.
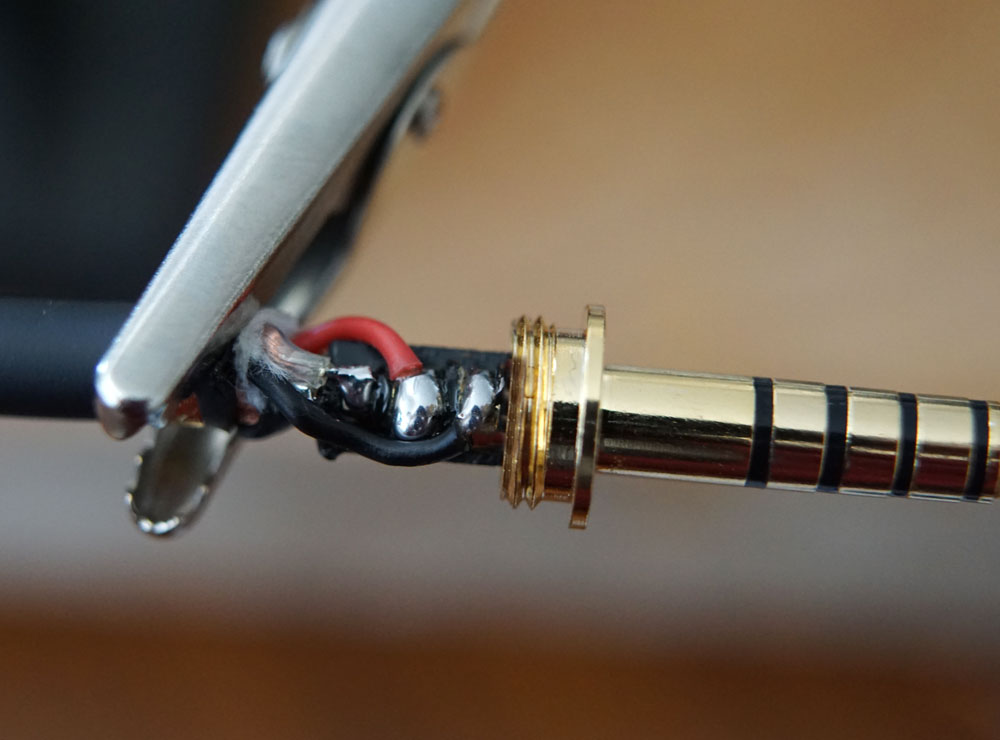
A good solder joint is ahappy shiny one. Mirror-finish is what you need, along with a good tug or two to ensure it survives some brute force.
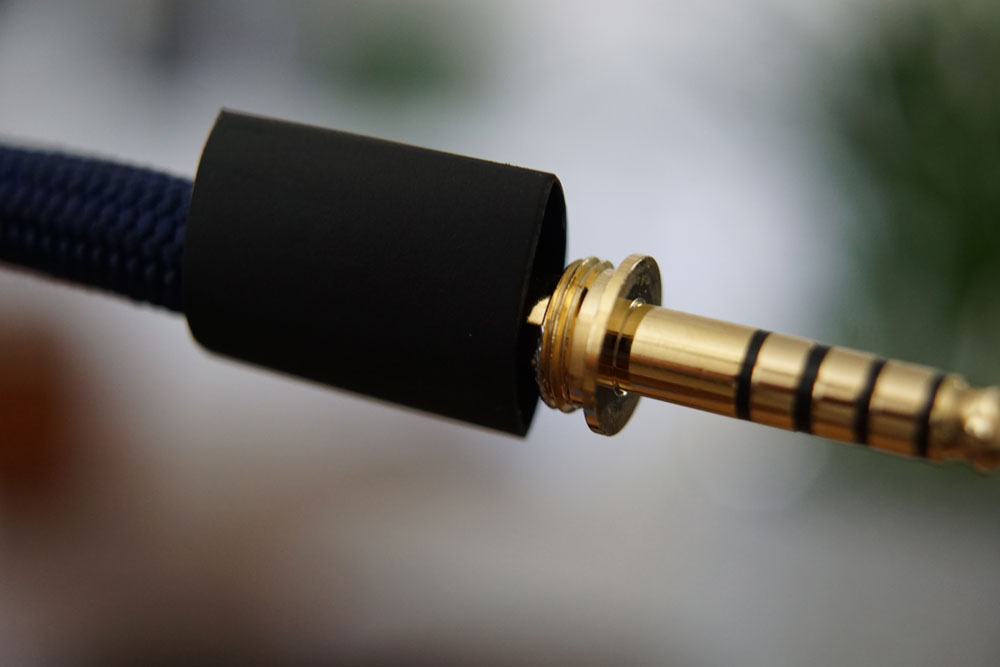
If your connector came with a plastic sleeve, slide that on around the joints - otherwise some heatshrink here is a good idea. Just double-check diameters - you don't want the heatshrink interfering with the rest of the connector housing.
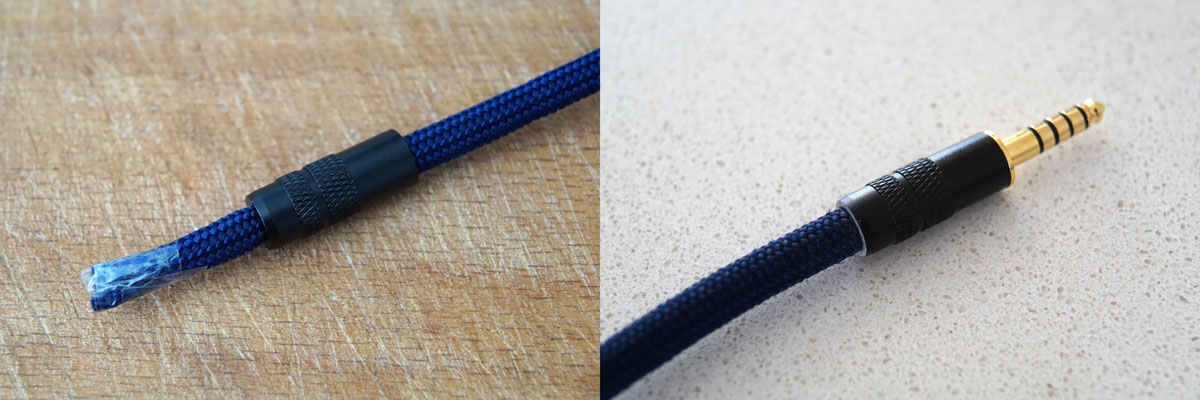
Slide the housing on from the other end of the cable.
TIP! Use some tape to seal the end of the Paracord, so the threads don't unravel or get in the way.
Ideally, the housing should require a little elbow-grease to thread onto the connector - but be careful not to apply too much force, and resist the urge to use pliers. Hand-tighten only!
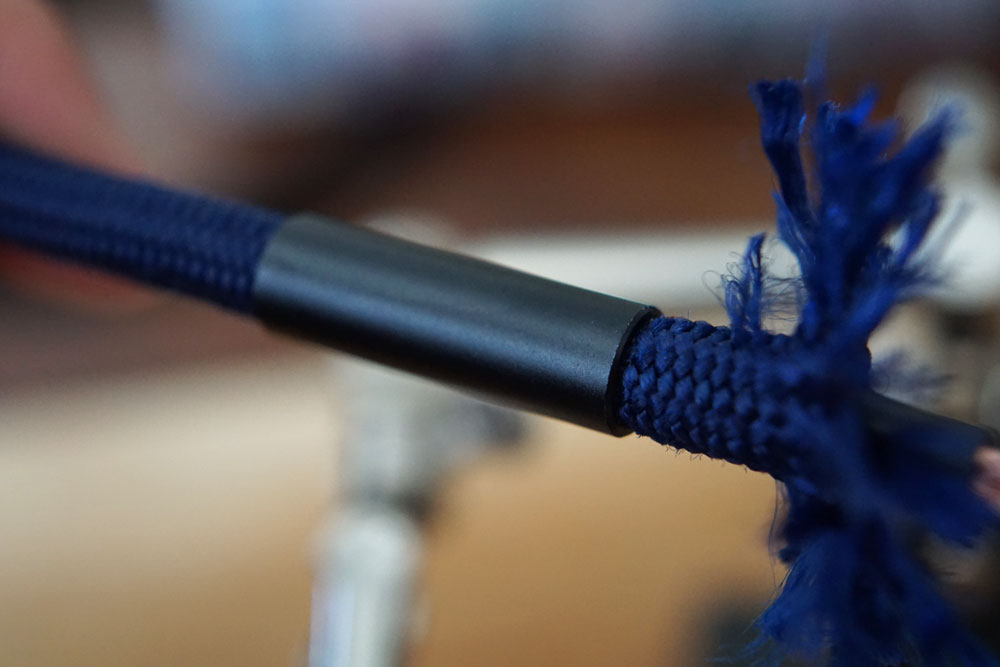
Before moving on to the two smaller cables, if you have a premade Y-split boot now's the time to thread that on to the other end of the cable. Here, I've used the aluminium housing from a spare 3.5mm jack which will act as a surefire heatshrink neatening device later.
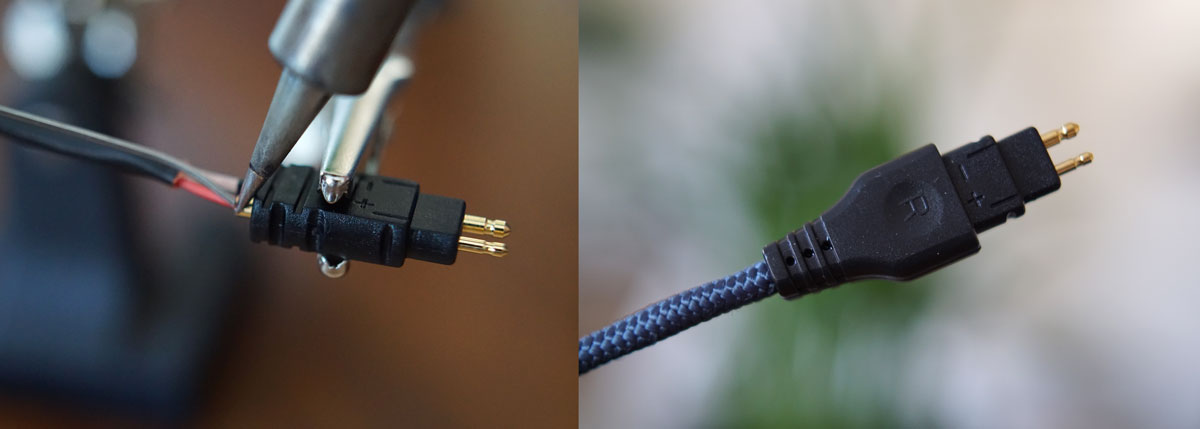
Cut the two smaller cables - copy the length from a preexisting cable for your headphones. Too short and the split will touch your chin, too long and the cable will be prone to tangle. And it will look silly.
Thread on some Paracord (godspeed!), strip the ends, twist the conductors and solder on the connectors, making sure you keep colour-coordinated for left/right/ground.
It doesn't hurt to use a tiny drop of two-part epoxy when sealing up these Sennheiser connectors, just to ensure they're rock solid.
TIP! Make absolutely, 100% sure both smaller cables are exactly the same length at this point. Cut one of them to match the other if needed. If they vary by even a few millimeteres, the headphones will "tug" at one side of your head. And look a bit silly.
Strip the other ends of the smaller cables, and get soldering to the main one! Use a continuity tester religiously to ensure you're soldering the right cables to each other. With a little practice, you can also get quick enough with the iron to ensure heatshrink can go over each and every join you make, insulating them from each other.
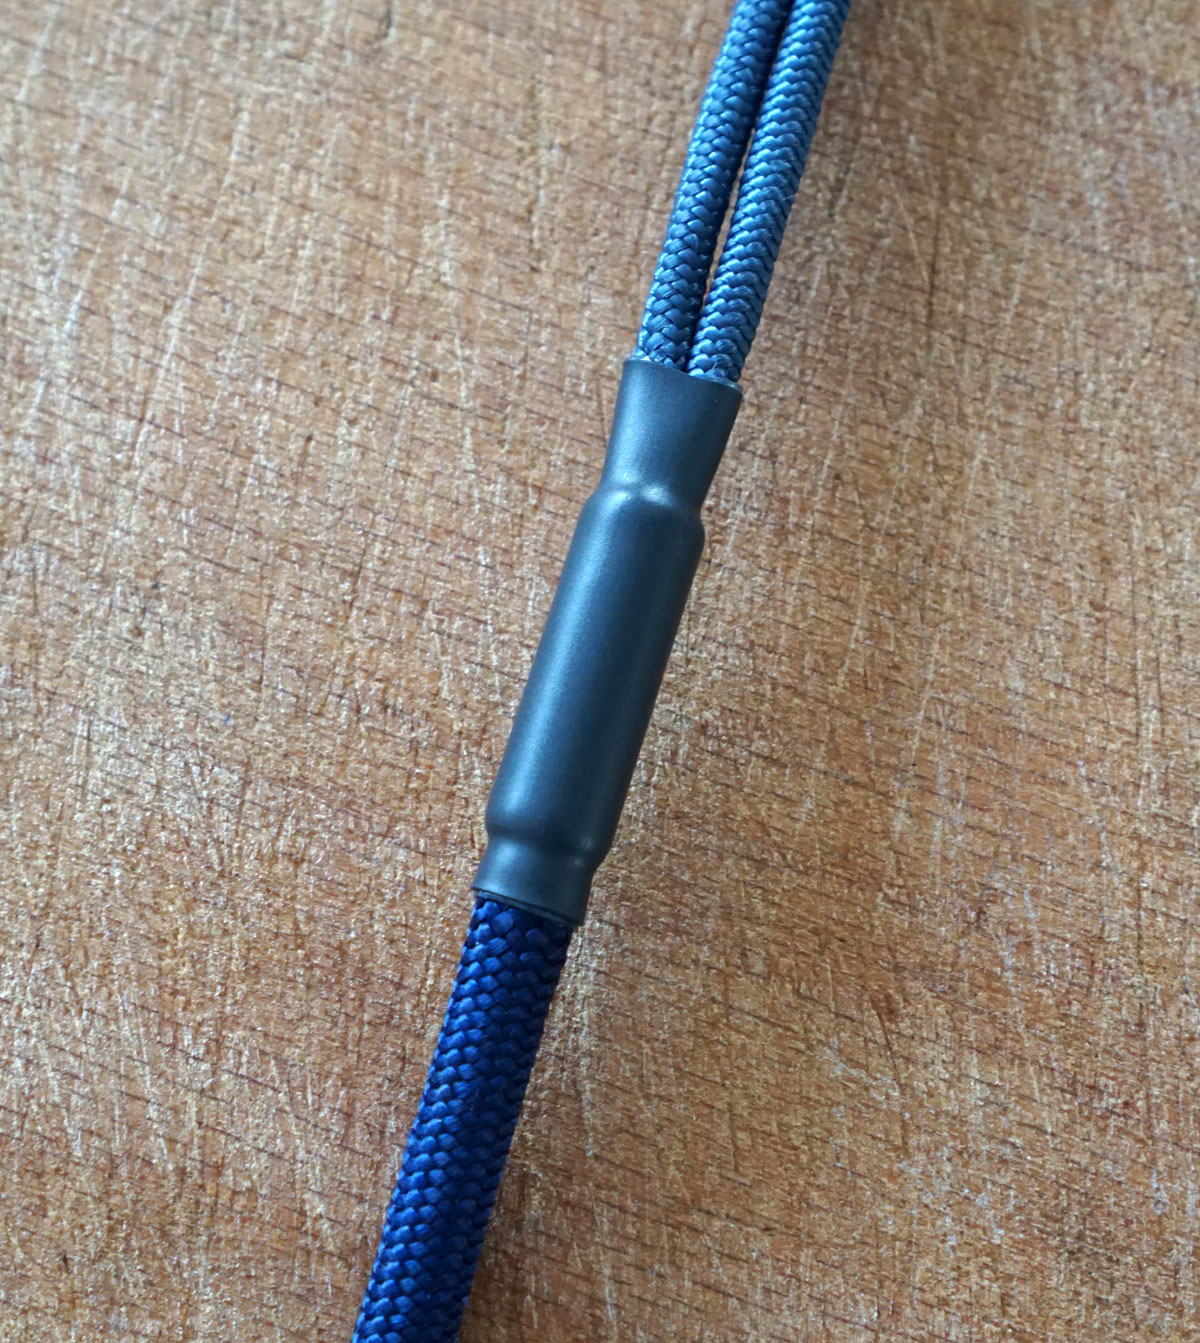
Using my small cylinder trick makes sealing the join dead easy. Slide the cylinder over the join area and slap some industrial adhesive heatshrink on top. Neat, extremely durable and light.
TIP! If you look closely here, you can see a little of the adhesive poking out the ends of the heatshrink. DO NOT be tempted to "trim" this off. Firstly, it has a habit of simply disappearing after a little use and wear. Secondly, any attempt at get something sharp close to that glue is going to inevitably end up severing the Paracord fibers, which would be a shame this late in the game.
Voila!
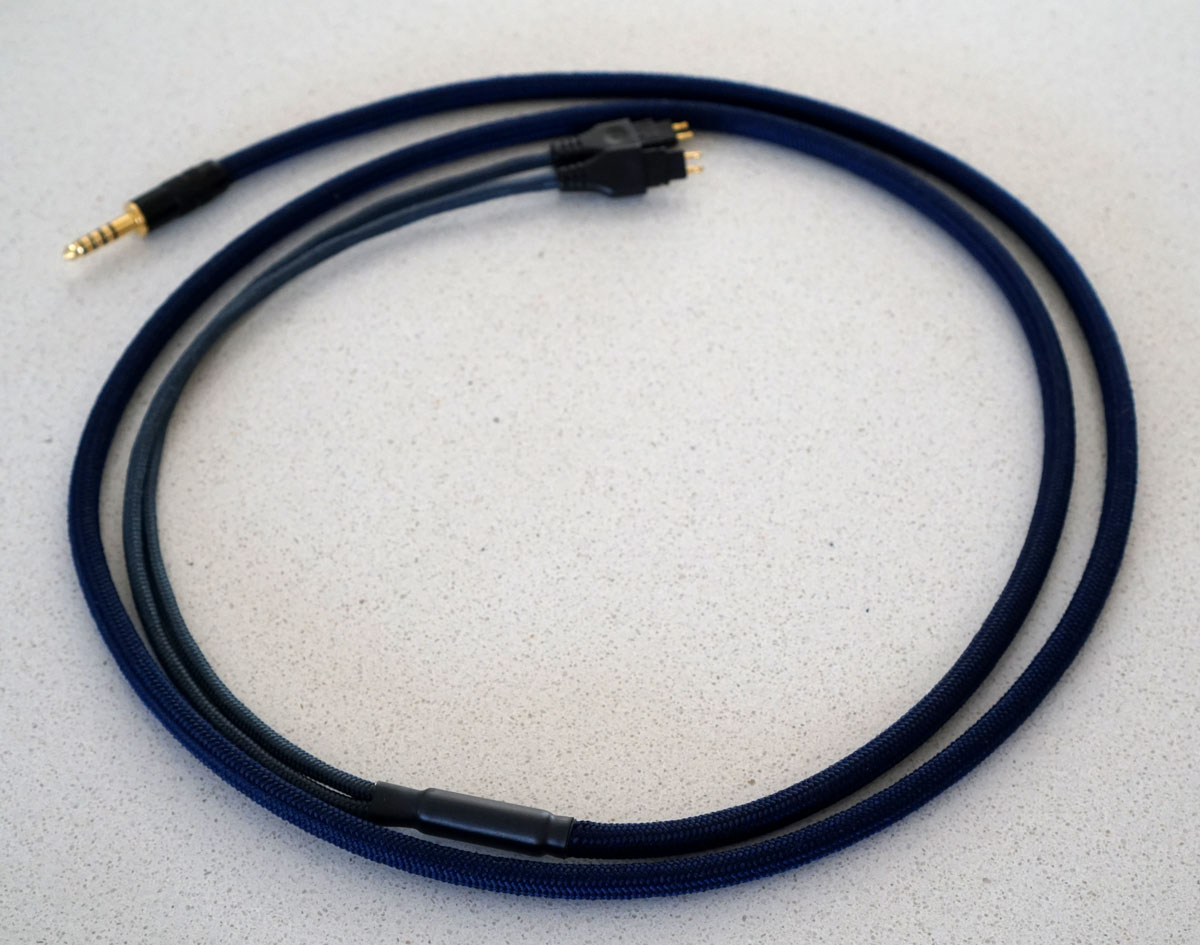
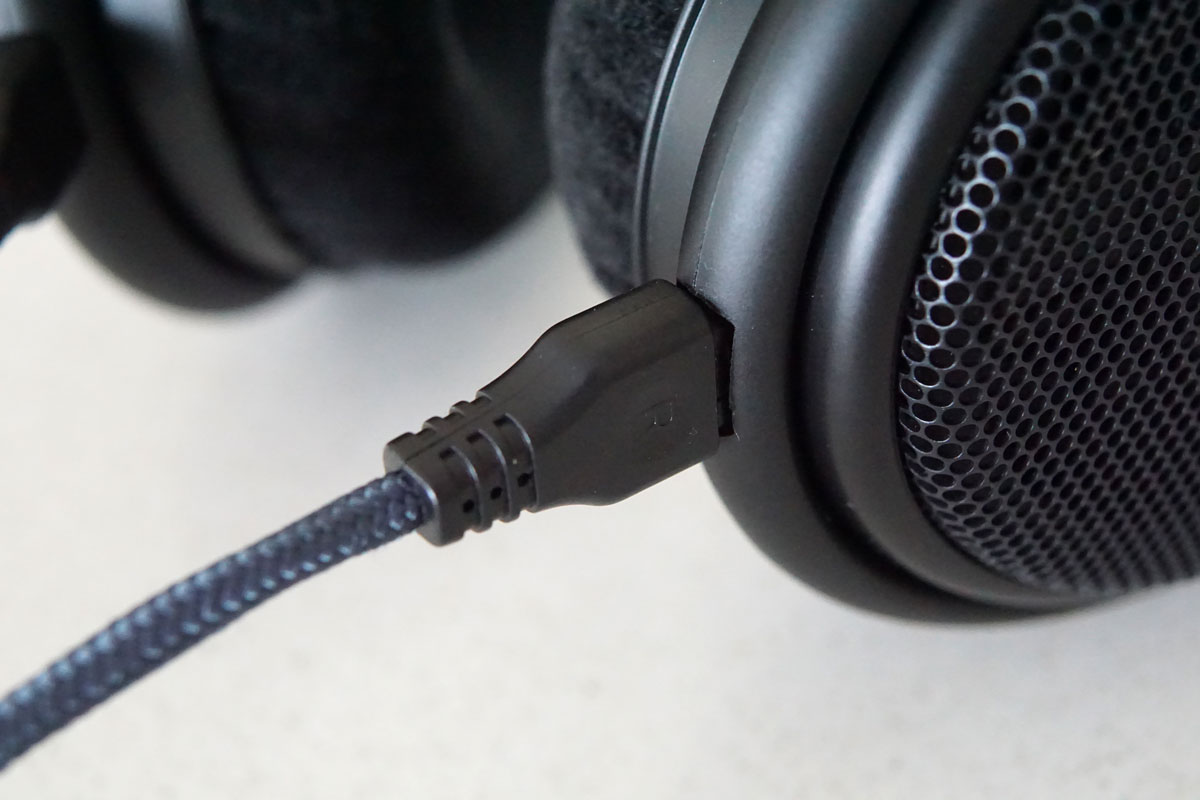
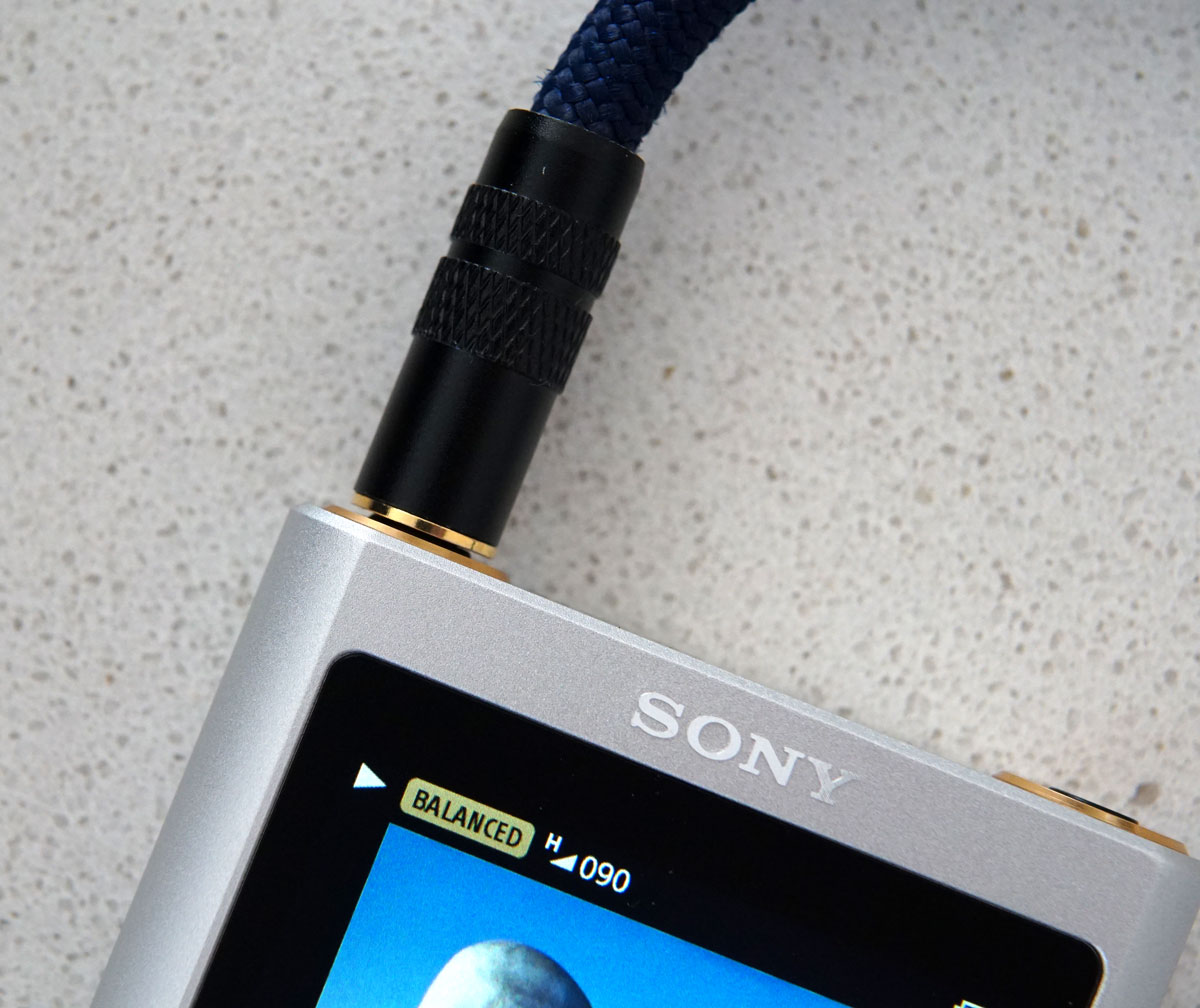
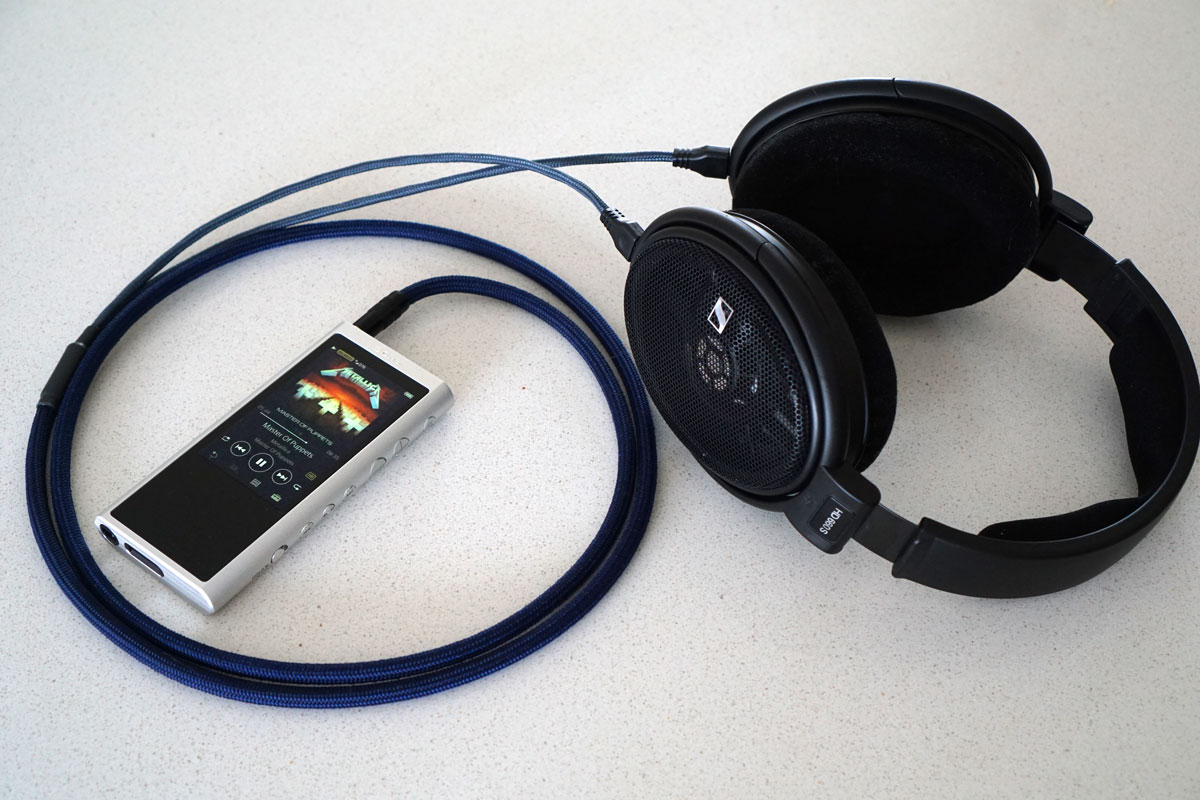
There we go! I chose a nice navy blue main cord with a slightly lighter ("Federal") blue for the headphone connector cables.
TIP! Give the connectors one last continuity test before plugging in and exposing your precious headphones to possible miswiring.
=== Testing ===
Two kinds of testing - durability and electrical.
Durability
Plug them in, and start wiggling. Seriously - wiggle the connectors, twist the cable give it a little abuse. Flick the Y-split as well. Now's the time to find out if you have any cold solder joints.
Electrical
Full disclosure: I am firmly in the "if a cable is made well, is the right thickness versus length for the requisite current and is nicely shielded it will sound transparent" camp. My aim is not to make cables that "sound better" (!), but rather to make nice looking, durable, well made cables that will last a long, long time.
That being said, when I sell a cable to someone (for the sake of due diligence) I have a reference cable that I compare against subject to a full frequency response test. So far, so good Which is to say, flat. In addition, where shielding is properly terminated a homebrew cable like this will be slightly better at resisting interference than many off-the-shelf ones as well. So there's that.
Very happy with this one. In future, I'll make some adapter cables allowing me to plug this into a number of SE inputs as well as 4-pin XLR jacks. Very easy at this point to get a variety of options at a (comparatively) low cost.
Thanks for reading!
=== Tools ===

Gear up! My cable kit consists of the following:
- Side cutters - If you care about this sort of thing, it's worth investing in a quality pair. Consider Knipex (Amazon.de ships direct to SA). Get some flush cutters while you're at it.
- Needle-nose pliers
- Blunt tweezers - Useful for wrangling small wires around twists and turns.
- (Optional) NT cutter/box cutter/Stanley knife - If you're stripping a cable with thick insulation. Looking at you, Mogami.
- (Optional) Screwdrivers/Allen keys - If your connectors have captive screws/strain relief.
- Multimeter - Required! I keep a cheapie in my cable-assembly kit, purely for continuity testing. Save the Flukes for the workbench
If it beeps, it's enough.
- (Optional) Wire strippers - If your side-cutter skills are underdeveloped, these can come in handy, particularly for tiny wires.
- Helping Hands / small table vice - Required! Preferably two sets. Don't be a hero and think your two puny hands are enough.
- Soldering iron - I have an entry-level Magnum in my cable kit, along with a couple of tips. You only really need the small chisel tip, however. Perhaps the needle tip if you're looking to solder (for instance) a 2.5mm balanced plug.
- Solder - Leaded, please! The dolphins can be saved later - right now, you've got cables to make. Leaded solder means lower soldering temperatures, meaning less abuse to miniature plastic parts and insulation. I use Kester 44 (63/37) for everything. Avoid 60/40 if you can - you'd be surprised what a difference it can make to speed and accuracy.
- (Optional) Flux - If your connectors have been exposed to a lot of oxygen (read: lying around in your battery-and-old-cellphones-drawer for years) they can be stubborn to take solder. Some No-Clean Flux will put them in their place. Get a Flux pen rather than the tubs of paste/schmoo if you can find one - these are really handy for electronics in general.
- Heat gun / hot air station - While you might be able to get away with using the edge of the soldering iron or a butane lighter to apply heatshrink, don't take the chance. Heat guns or hot air stations make a much neater, more even seal and don't tend to melt your beautiful work.
=== Consumables ===

- Wire -
You're going to need some suitable wire for both the main length of the cable (from the audio jack to the Y-split) and from the Y-split to the headphone connector(s).
This can either be two different gauges/core counts - for instance, a 4-core thicker cable for the main length and two thinner 2-core cables to the headphones. Or it can be "IEM" style, with 4 single core wires wrapped/braided together which eventually branch off at the Y-split to the headphones.
My aim is always "needless levels of durability", so I prefer the first method.
Cables can be hard to select, with esoteric product codes and a bewildering number of choices. However, there's no point going through the trials and tribulations of DIY cable assembly if you're going to use whatever crappy Scooby Doo wire you have lying around. I suggest sticking to high-quality brands - Mogami, Gotham, Canare or (if you're swimming in cash) Cardas. Locally, they're all pretty tough to come by - but our main man Design By Max (www.designbymax.co.za) can hook you up.
I've tried a load of Mogami cables, here's my preferred lineup:
Mogami 2534 (4 cores + shield), 6mm dia. (Balanced)
Mogami 2893 (4 cores + shield), 4.8mm dia. (Balanced)
Mogami 2549 (2 cores + shield), 6mm dia. (SE)
Mogami 2552 (2 cores + shield), 5mm dia. (SE)
Mogami 2944 (2 cores + shield), 2.5mm dia. UGLY! (SE)
Mogami 2912 (1 core) 0.85mm, flexible jacket.
Mogami 2680 (1 core) 0.60mm, flexible jacket.
Notes:
1. 6mm is thick. That's going to be a chunky cable. For me, perfect.
2. Although certainly thicker than Chinese IEM cable wiring, the 2912 and 2680 make great braided-then-split style cables. These can then be sleeved or left as-is.
3. The 2944 makes a good, thinner split-to-headphones cable, but the thin outer insulation means it's fairly ugly - use only if you plan on being a sucker for punishment and doing some cable sleeving.
4. I'm a sucker for punishment - for this cable, I used 2893 for the main length and 2944 for the split-to-cans wires.
- Sleeving -
Clean presentation comes in three parts: heatshrink, sleeving and Y-split.
1. Heatshrink
Heatshrink is needed to insulate wires and (assuming it is adhesive-lined) form a good looking Y-split and add an extra seal to fiddly connectors. A cheap, non-adhesive pack of 2:1 or 3:1 heatshrink in a variety of sizes is useful to insulate wires (try Communica or the like). I'd also suggest splurging on some brand-name, adhesive 3:1 or 4:1 heatshrink to sleeve connectors and splits. Try 3M or TE brand - RS electronics is likely your best best. Get something with a 15mm diameter or more to ensure you can slip it over a completed assembly without having to desolder anything.
2. Sleeving
You can either sleeve your final assembly with some plastic sleeving or go FULL CABLE NERD and get some legit fabric Paracord. Or leave it bare.
Paracord is not cheap, and almost impossible to find in decent sizes in South Africa. I get mine in big batches from Amazon in a variety of diameters and colours.
TIP! Aim to get Paracord with a diameter of ~1-1.5mm larger than the cable you intend to sleeve. Any larger and the sleeve will look and feel butt ugly. Any smaller and you will simply not be able to thread it over the cable.
3. Y-splits
The eternal dilemma. How to get a neat cable split, that leaves the cable light enough suspended from your head but robust enough to protect the join? Not easy, and this is by far the hardest part to get right. There are loads of options.
You can buy some premade plastic Y-splitters on Aliexpress (search terms should include "split", "boot" and "pants" - not kidding). These are bizarrely expensive for little pieces of Chineseum petroleum byproduct, however. And they'll take 4 months to arrive by SAPO.
Of course you can use heatshrink. There is a real art to doing this well - you need at least 4:1, top-quality adhesive heatshrink and very good control of a heatgun. This can either be a simple sleeve (see my post https://www.avforums.co.za/index.php/topic,76456.msg897186.html#msg897186) or using some needle-nose pliers and gradual heat you can slowly shape the heatshrink into a nifty Y-shape (see https://www.avforums.co.za/index.php/topic,76456.msg896452.html#msg896452).
Lastly, you can use some external piece of hardware to ensure a perfectly smooth, simple heatshrink seal with no lumps or imperfections. The trick is to find a small metal or plastic cylinder that just fits over the assembly/split. I recently hit on the idea of using the metal case from a 3.5mm TRS jack, which is the method I use here.
Lastly, if you're going for the braided "IEM" style cable route, you can be a lot less troubled by the Y-split, as no solder join in the middle will be required. The split can be sealed by a dollop of hot glue and covered by some heatshrink to good effect.

And of course, you need some connectors, ones that attach to the cans and one for the business end of the cable, be it 3.5mm TRS, a 4-pin balanced XLR or a god-awful 2.5mm Fiio-standard TRRS. Whatever you need.
For 3.5mm or XLR cables I recommend Neutrik or Amphenol connectors. Amphenol is easier to work with, with better strain relief (IMO), but Neutrik is a more audiophile-approved brand name.
For others, Mouser, Digikey or Aliexpress are your best bet. These are also good places to get the connectors for the cans themselves - Reen mini-xlrs for Audeze, or MMCX connectors for many IEMS, or 2.5mm or 3.5mm balanced connectors, brand depending.
I'm making a balanced cable for my Senny HD660s. Specifically, I'm obsessed with the 4.4mm balanced connector ("Pentaconn" or "Sony Balanced"), which in my humble opinion should be the standard for portable balanced gear. The HD660 actually includes a 4.4mm cable in the box, but it is ludicrously long, which for a portable device is just annoying. Also, I want a sexy blue Paracord cable
(I've used literally every variety of DIY Sennheiser HD6XX connector, from Cardas to the cheap Aliexpress ones. The best option by far is to sacrifice one of your official Sennheiser cables and snip them off at the Y-split. That way, you get two perfectly sized cables with connectors pre-attached. And they are simply the best quality. In this case, I'm using some decent DIY ones from China, which I honestly find much easier to work with than the expensive ones from 6moons and the like. YMMV.)
=== Process ===

Continuity test your connectors! And write down which contact refers to which pin, either Left, Right or Ground for SE cables or L+, L-, R+ and R- for balanced.
This incredible article from diyAudio has a beautiful list of the most common connectors and their pinouts as they relate to audio. Lovely:
http://www.diyaudioblog.com/2016/02/headphone-connectors-pins-pinouts-for.html
Nevertheless, write down which pin is which. You won't regret it. Do this for all your connectors.

Cut your main cable to length. When in doubt, 1.8m is a good compromise between portability, length and hassle.
Line one end of the cable up against your terminal connector and mark where you need to strip the insulation.

If the insulation is very thick, carefully score it with a knife before using side cutters/pliers to strip it off. If you took off any shield wires, cut it back and try again. (On a balanced cable, the shield wires are slightly less important - they don't form the ground - but may as well do it right
Only strip one side for now!

Cut away any strain-relief or lead material (the fabric/plastic, non-conductive strands inside the cable). Untwist and isolate the individual wires, and neatly twist the bare shield wires together.

While we're at it, cut the larger diameter Paracord slightly longer than the main cable length - it tends to shrink in length once it's been sleeved onto the cable.
Carefully, using some needle-nose pliers, remove the inner strands of the Paracord. Feel free to throw them away, or let the cat play with them.
TIP! Don't buy "coreless" Paracord. They ship it flattened - so the nice, cylindrical shape is lost - which makes it a nightmare to snake into the cable. Rather used regular Paracord and gut it.

Get ready to stay patient. Your first few times snaking Paracord onto a cable are going to be lessons in humility, that's for sure. The first few centimetres will go on easily, and thereafter friction becomes your enemy, meaning you'll be working it on millimeter by painstaking millimeter. With a long cable it becomes tough to determine whether you're actually making any progress, but a constant "bunch with your off-hand hand, and pull with your dominant hand" motion is the key and becomes muscle-memory after a few tries.
TIP! Get a work glove for your dominant hand. You absolutely will get cocky at some point and give yourself rope burn. In addition, a glove makes the process a little quicker, as you can apply decent force without mangling your palm.
When the cable is fully Paracorded, stretch the cord out as much as possible over the insulation to get a nice, seamless fit. You shouldn't be able to rotate the Paracord around the cable. If you can, you likely picked too wide a cord. Oops!
At this point, back the Paracord off by a few centimeters and strip the individual conductors. For each, twist the copper wires neatly together and tin them with a dash of solder.

Solder time! Line up your cord in some Helping Hands - cord on one side and the connector on the other. Tweezers come in handy here to line up a wire to a conductor on the connector. Using the ole' "nudge the solder wire with your pinky trick", you should have the 5 necessary hands to complete this without much fuss.
Connectors like TRS jacks have plastic insulation barriers between the conductors. A quick, "in-then-back-away" motion with the soldering iron is necessary to prevent these from melting. Flux if you need to, and use leaded solder.
Keep all the solder joints as bunched around the connector as possible - large joints flailing about the connector is going to make it hard (or impossible) to slide the housing around afterwards.

A good solder joint is a

If your connector came with a plastic sleeve, slide that on around the joints - otherwise some heatshrink here is a good idea. Just double-check diameters - you don't want the heatshrink interfering with the rest of the connector housing.

Slide the housing on from the other end of the cable.
TIP! Use some tape to seal the end of the Paracord, so the threads don't unravel or get in the way.
Ideally, the housing should require a little elbow-grease to thread onto the connector - but be careful not to apply too much force, and resist the urge to use pliers. Hand-tighten only!

Before moving on to the two smaller cables, if you have a premade Y-split boot now's the time to thread that on to the other end of the cable. Here, I've used the aluminium housing from a spare 3.5mm jack which will act as a surefire heatshrink neatening device later.

Cut the two smaller cables - copy the length from a preexisting cable for your headphones. Too short and the split will touch your chin, too long and the cable will be prone to tangle. And it will look silly.
Thread on some Paracord (godspeed!), strip the ends, twist the conductors and solder on the connectors, making sure you keep colour-coordinated for left/right/ground.
It doesn't hurt to use a tiny drop of two-part epoxy when sealing up these Sennheiser connectors, just to ensure they're rock solid.
TIP! Make absolutely, 100% sure both smaller cables are exactly the same length at this point. Cut one of them to match the other if needed. If they vary by even a few millimeteres, the headphones will "tug" at one side of your head. And look a bit silly.
Strip the other ends of the smaller cables, and get soldering to the main one! Use a continuity tester religiously to ensure you're soldering the right cables to each other. With a little practice, you can also get quick enough with the iron to ensure heatshrink can go over each and every join you make, insulating them from each other.

Using my small cylinder trick makes sealing the join dead easy. Slide the cylinder over the join area and slap some industrial adhesive heatshrink on top. Neat, extremely durable and light.
TIP! If you look closely here, you can see a little of the adhesive poking out the ends of the heatshrink. DO NOT be tempted to "trim" this off. Firstly, it has a habit of simply disappearing after a little use and wear. Secondly, any attempt at get something sharp close to that glue is going to inevitably end up severing the Paracord fibers, which would be a shame this late in the game.
Voila!


There we go! I chose a nice navy blue main cord with a slightly lighter ("Federal") blue for the headphone connector cables.
TIP! Give the connectors one last continuity test before plugging in and exposing your precious headphones to possible miswiring.
=== Testing ===
Two kinds of testing - durability and electrical.
Durability
Plug them in, and start wiggling. Seriously - wiggle the connectors, twist the cable give it a little abuse. Flick the Y-split as well. Now's the time to find out if you have any cold solder joints.
Electrical
Full disclosure: I am firmly in the "if a cable is made well, is the right thickness versus length for the requisite current and is nicely shielded it will sound transparent" camp. My aim is not to make cables that "sound better" (!), but rather to make nice looking, durable, well made cables that will last a long, long time.
That being said, when I sell a cable to someone (for the sake of due diligence) I have a reference cable that I compare against subject to a full frequency response test. So far, so good
Very happy with this one. In future, I'll make some adapter cables allowing me to plug this into a number of SE inputs as well as 4-pin XLR jacks. Very easy at this point to get a variety of options at a (comparatively) low cost.
Thanks for reading!
