Well, its been a long time coming, but here it is - a write-up of my American-Walnut-Seas mini (dare I say monitor  ) speakers!
I have a lot of pictures, so I will try to keep words to the minimum.
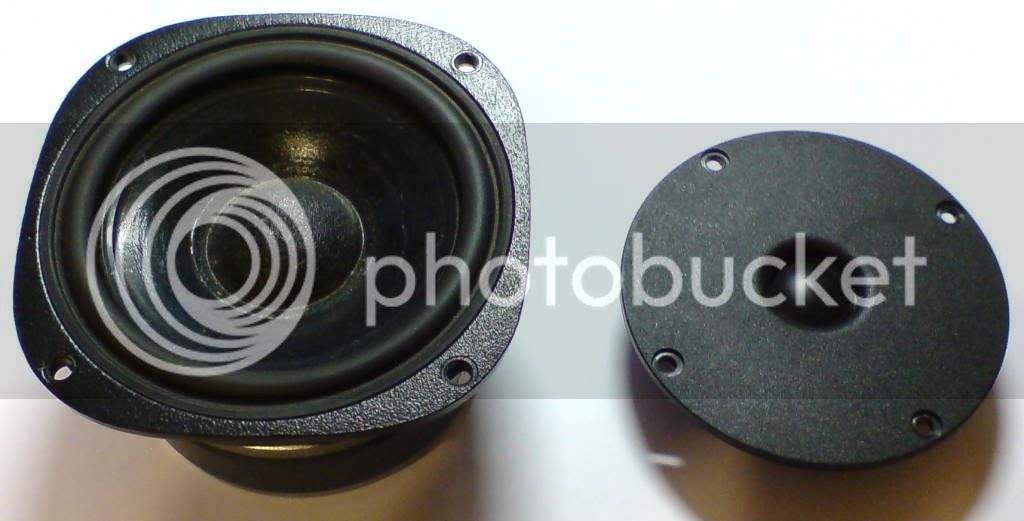
Here are the drivers (Seas 19TNF (H225) tweeter and CA11RCY (H149) woofer):
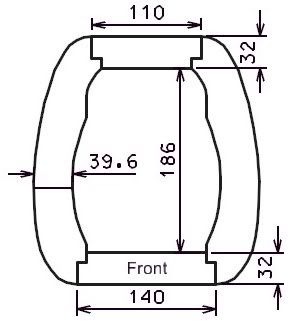
Here's a schematic of what I had in mind i.t.o. the box shape:
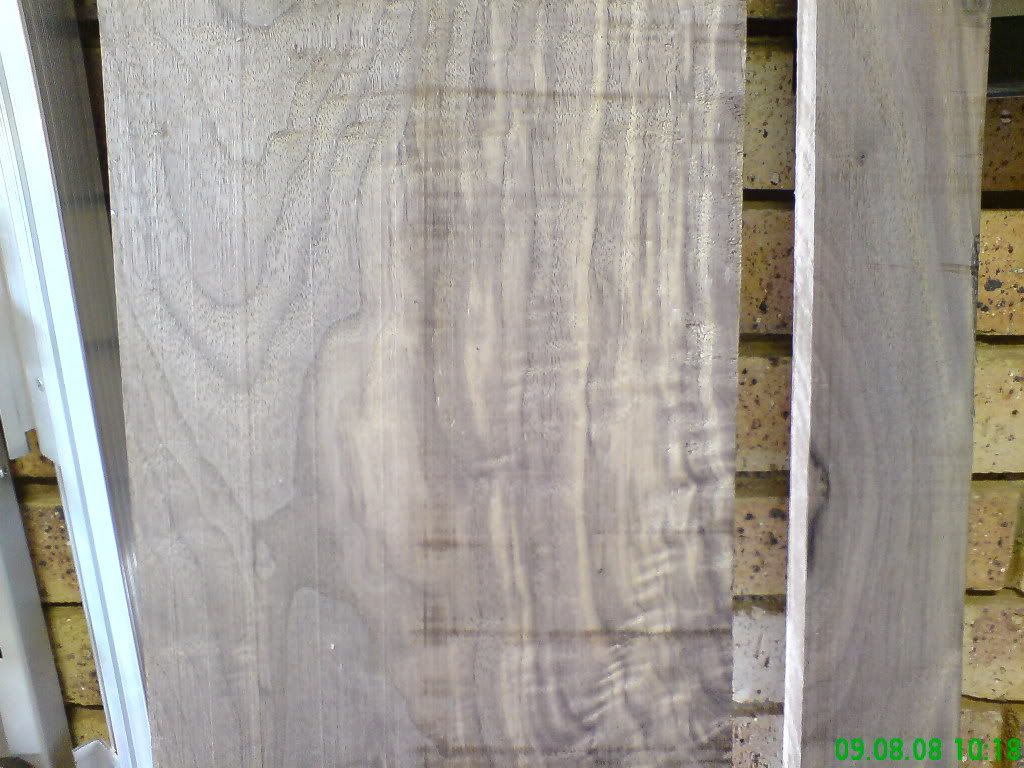
Here's the what the raw walnut planks looked like (bought from Silverton Timber Merchant):
Two of the over 50 segments that had to be done:
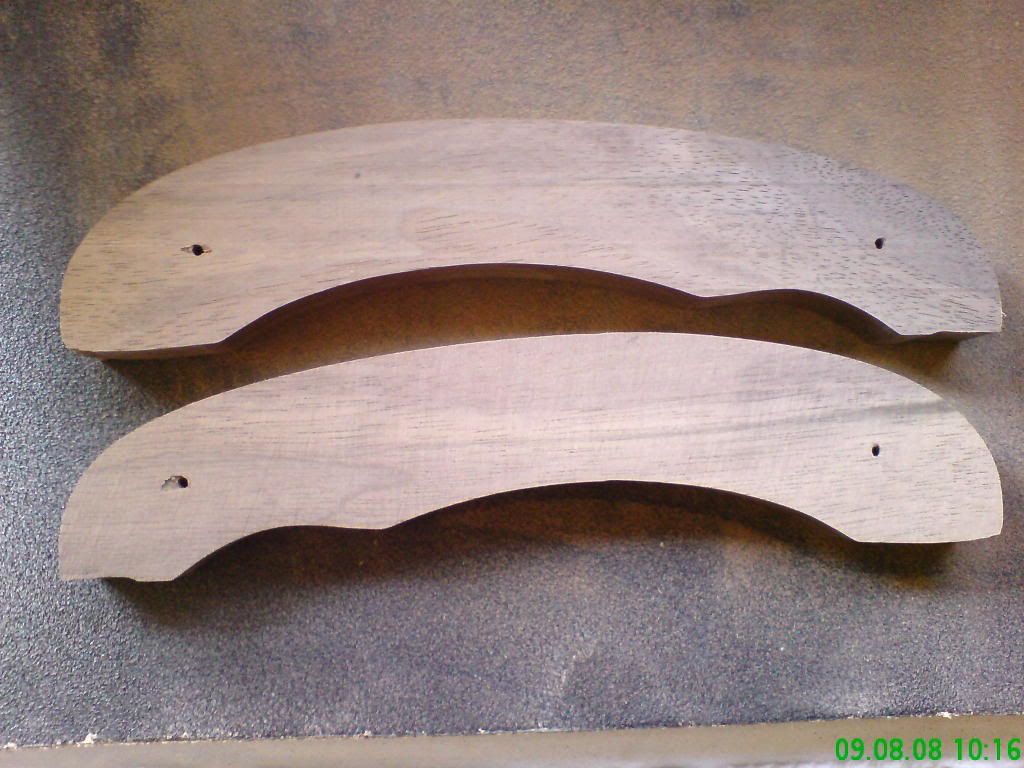
This involved the following:
1. Cut the walnut planks into strips
2. Cut the strips into blocks of 255 x 60 x 22mm
3. Trace the shape of the segment from the router template (cut from 16mm MDF)
4. Roughly cut away excess wood on the band saw
5. Attach the router template to the roughly cut segment
6. Router segment to shape going WITH the grain (here-in lies the story of R110 in school fees : )
)
7. Attach the template to the other side of the partly shaped segment and router the rest into shape
8. Repeat 50 times
These are SOME of the segments from the side:
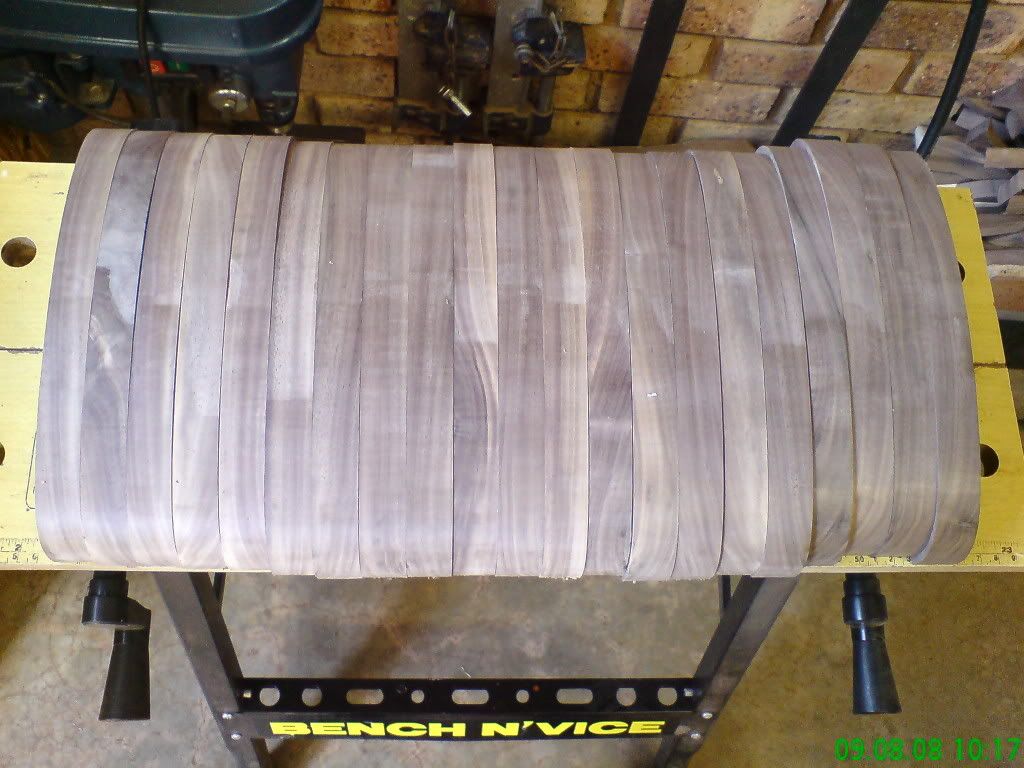
Once all segments were done I drilled holes for the 3 10mm dowels that would (I hoped really hard for this) align the segments when gluing.
Here's the jig that I used to drill the holes for the dowels, for one end of the segments only. I had 2 other jig inlays for the other two holes.
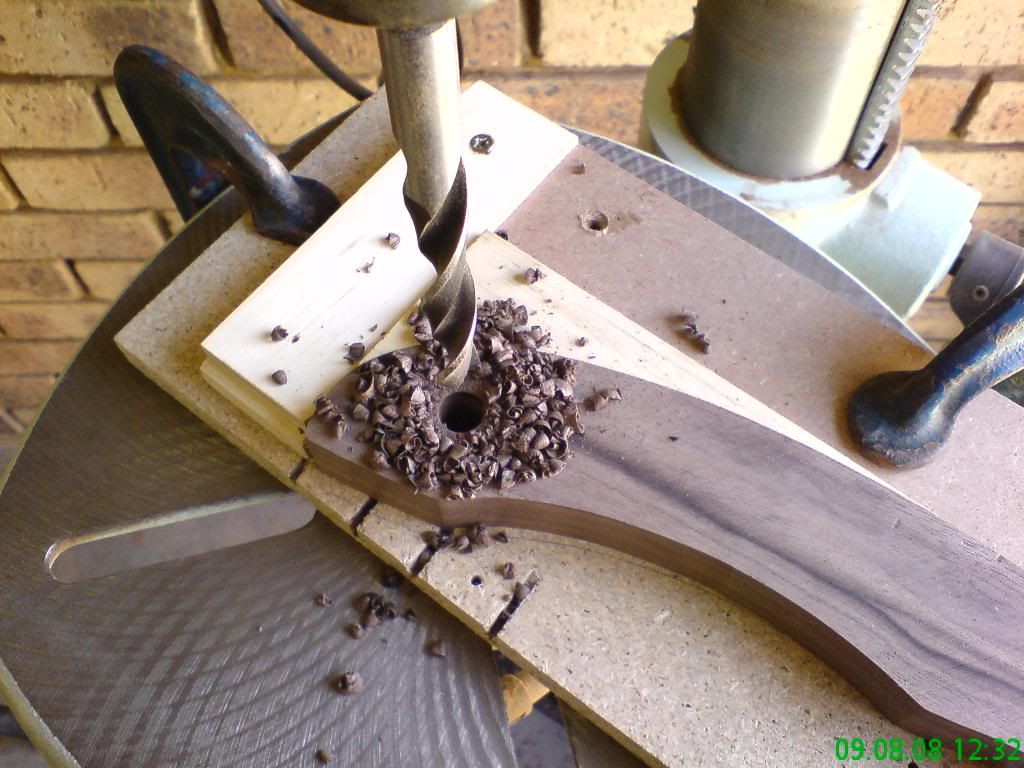
As is turned out, this trick didn't work well. Firstly, the holes did not align properly when the segments were stacked against each other. My drill jig was obviously not accurate enough (yeah, blame the tools!), or I wasn't careful enough. In the end I had to clamp the segments together - only 6 at a time - and ream the holes until the dowels fitted.
That done, it was time for gluing:
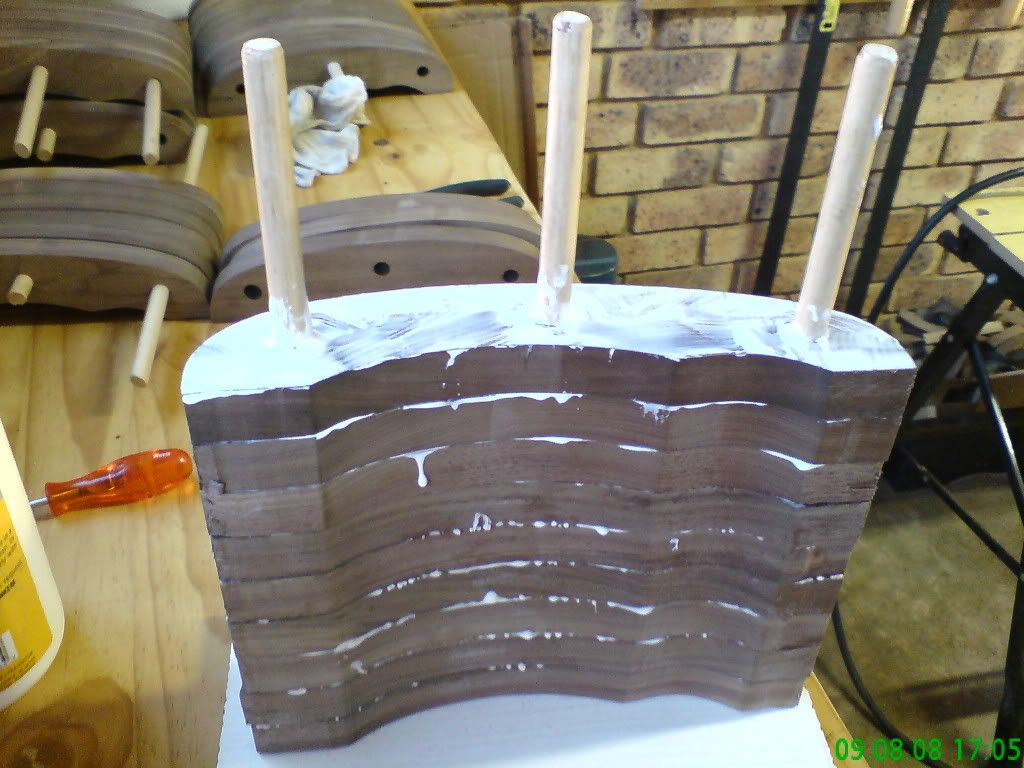
I glued only six segments together at a time. I made very sure I covered the entire surface of the segment to ensure a good bond. Now, here's the biggest lesson I learned through this exercise: do not use quick set wood glue when you have to glue many pieces together. In fact I wouldn't use the long dowel trick again. I'd rather use short dowels like these:
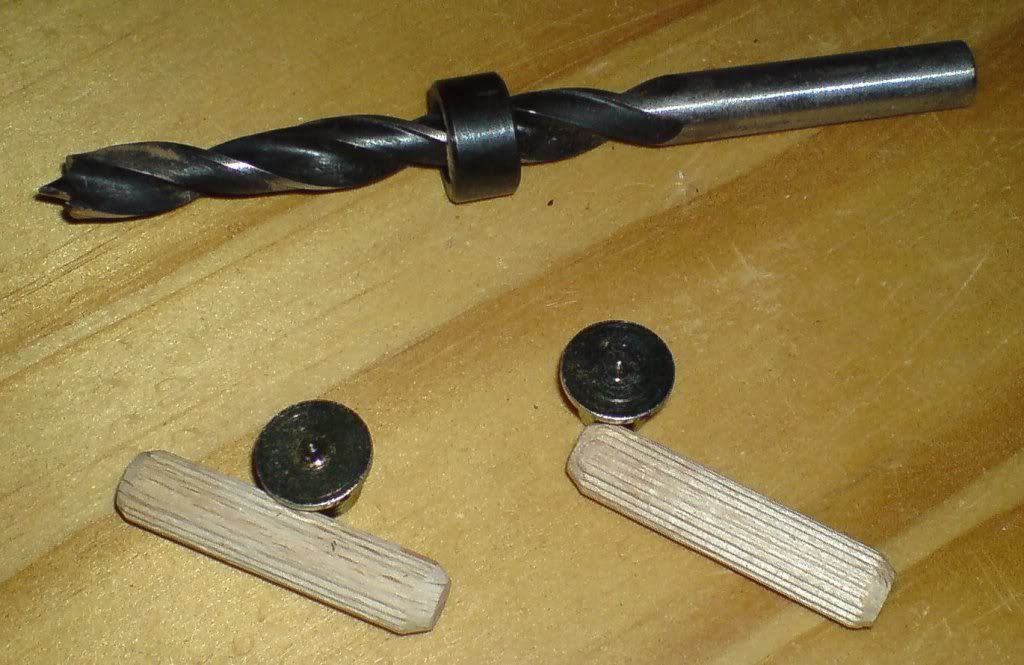
They work like this: first you drill the holes in one segment, insert the metal spikes, lay the next segment over the spikes and align it properly then lightly hit it with your palm/rubber mallet so that the spikes make marks in the top segment. And there you have perfect indicators of where to drill the holes. It works brilliantly . So next time (yip, the bigger brothers/center channel/sub are still coming...) I'll use this mechanism and glue 2 to 3 segments only at a time. The problem with gluing many segments with quick set wood glue is that by the time you get to clamping them (after applying glue evenly to all segments), the glue of the first segments has started to set onto the dowels already and clamping doesn't have the desired results. It is also more difficult to ensure the many segments don't buckle or twist.
Once the first 6 segments were glued, I did the other 6 ending up with 12 segments that would form one side panel.
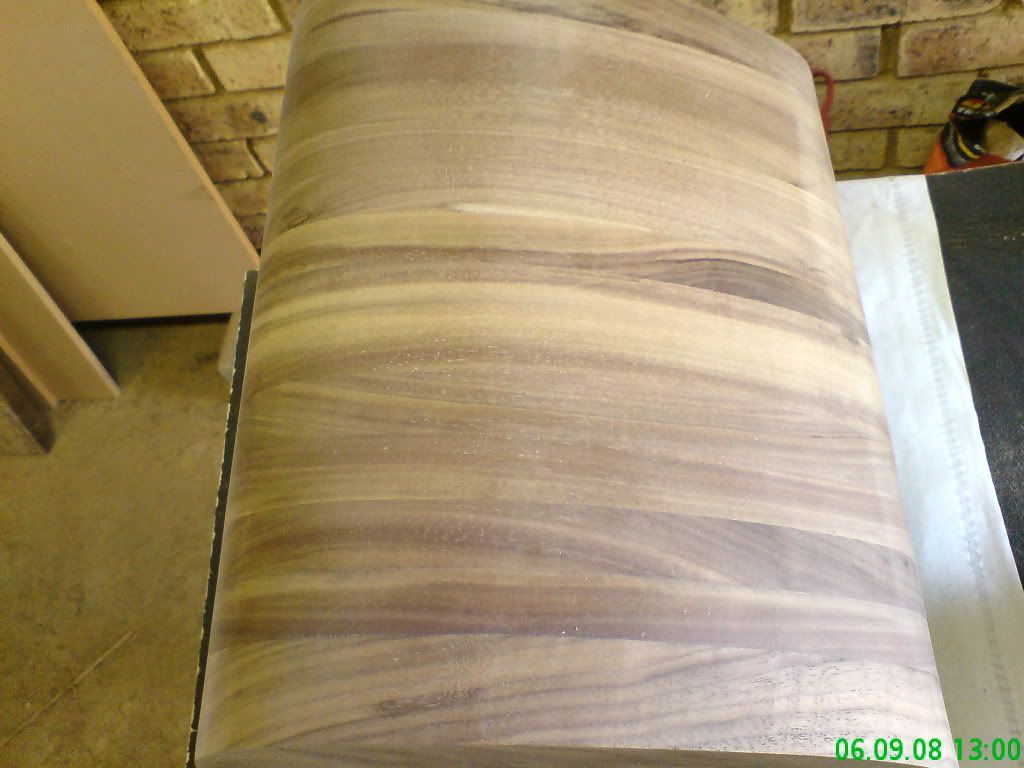
After A LOT OF SANDING I ended up with this:
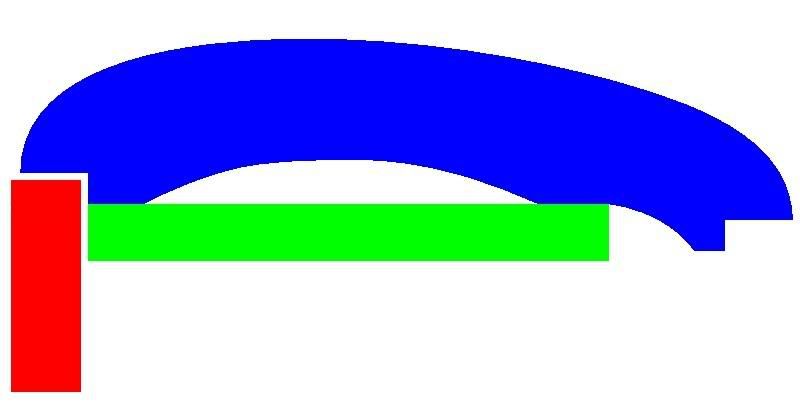
I now had to cut slots for the baffles (front and back). I made sure I had two parallel surfaces on the inside of the segments for this purpose. The schematic below shows what I had in mind:
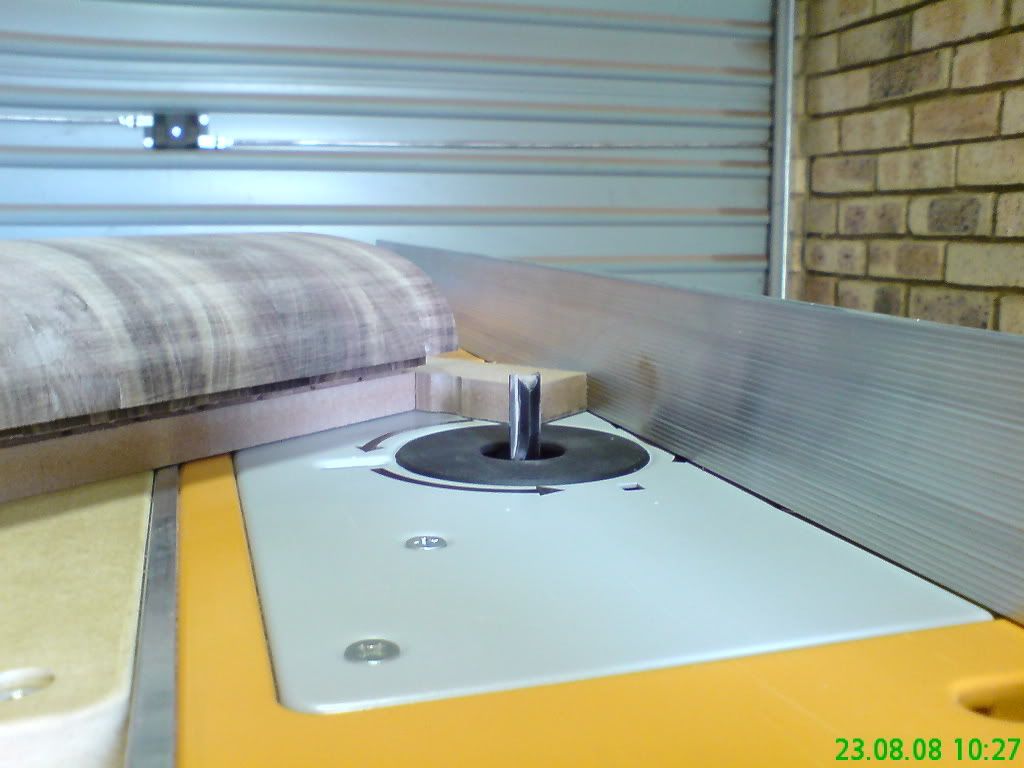
Here's the real thing:
And the end result:
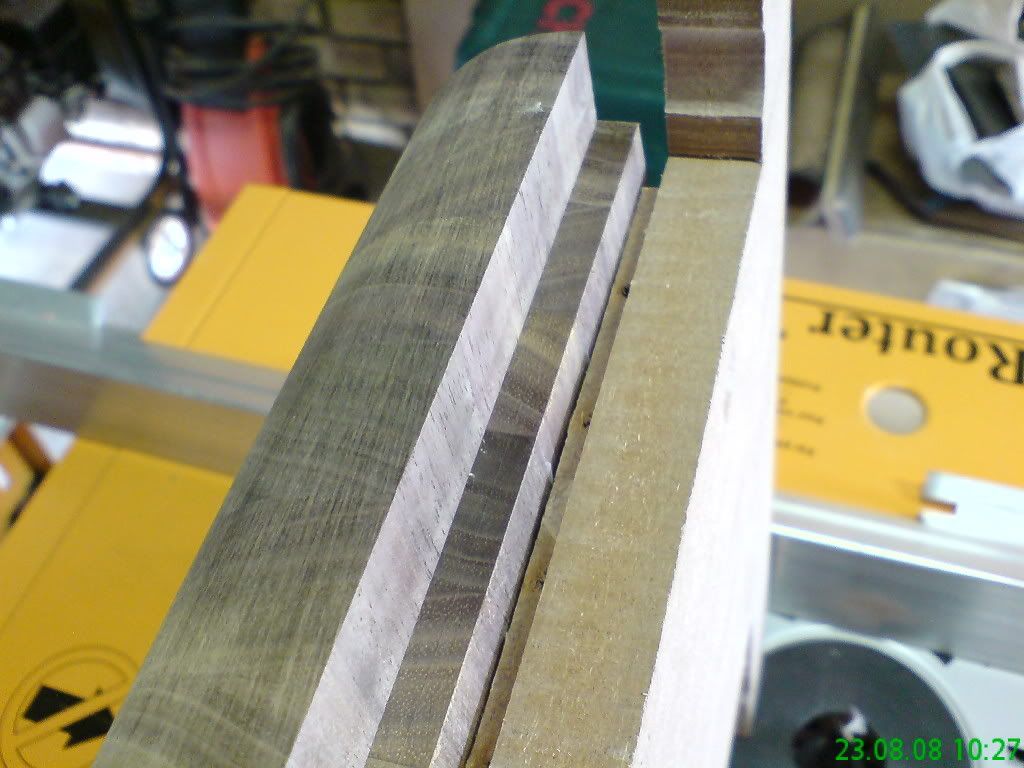
The top and bottom of the boxes I made from solid 32mm walnut. I had to "plane" some irregularities out of these, but I don't have a planer/thicknesser so I used this trick:
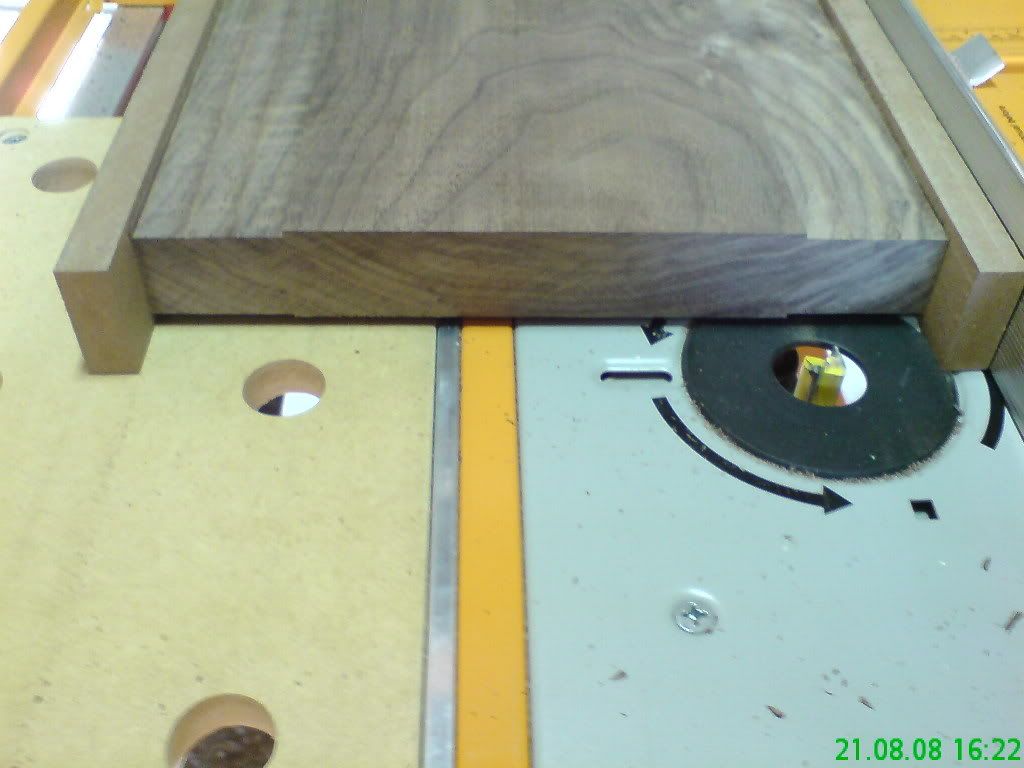
Attach two guide planks on the sides of the walnut plank and run it over (and over and over and over...) the router table. I'm sure you can figure out what I did. It worked quite well.
I used the short dowel/spike trick mentioned above to glue the tops and bottoms to the side walls. I first cut away the excess wood again and after gluing them to the side walls used a laminate trimmer bit to shape them to the side walls and baffles. I gave the bottom a 5mm round over and the top table edge profile.
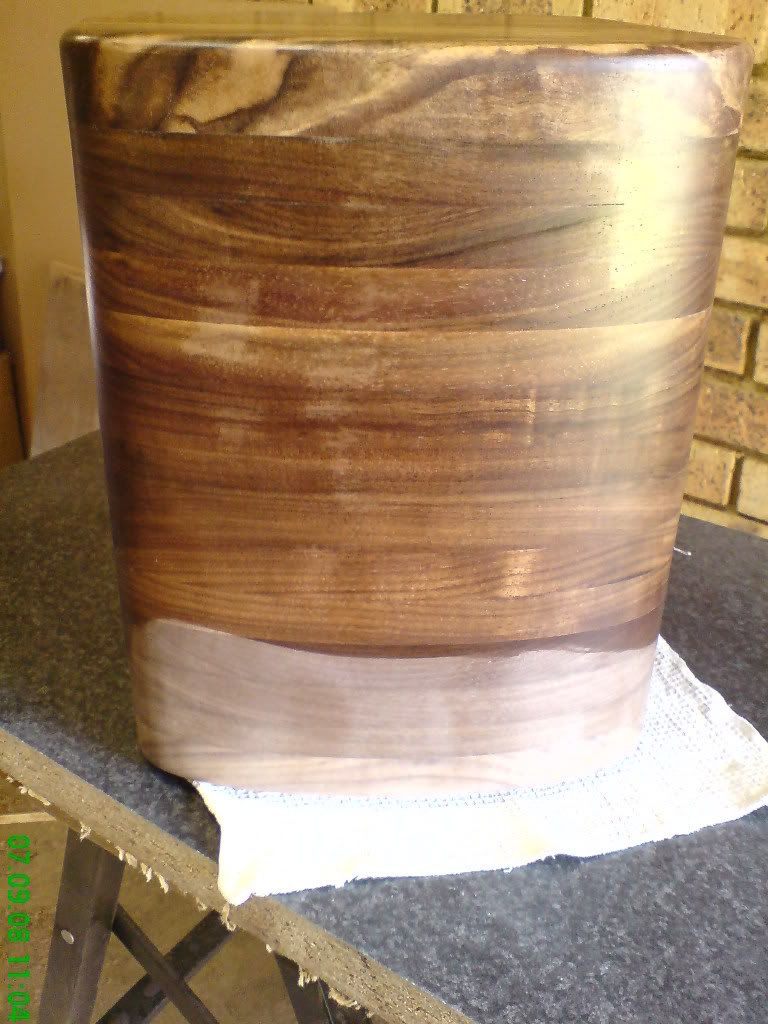
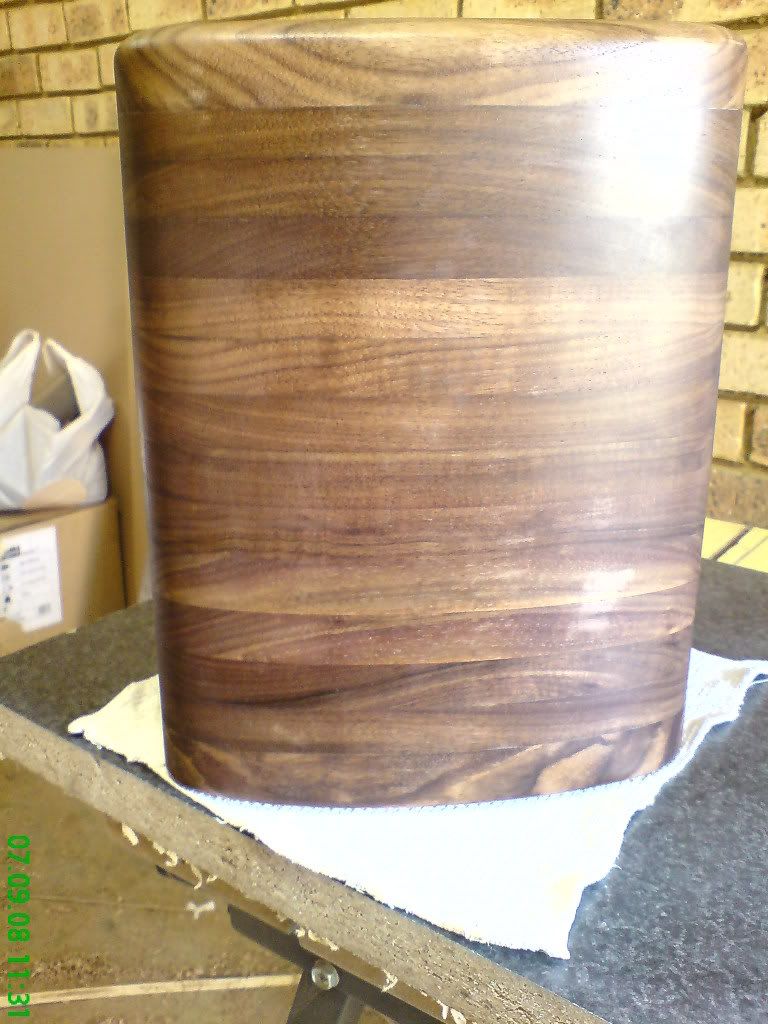
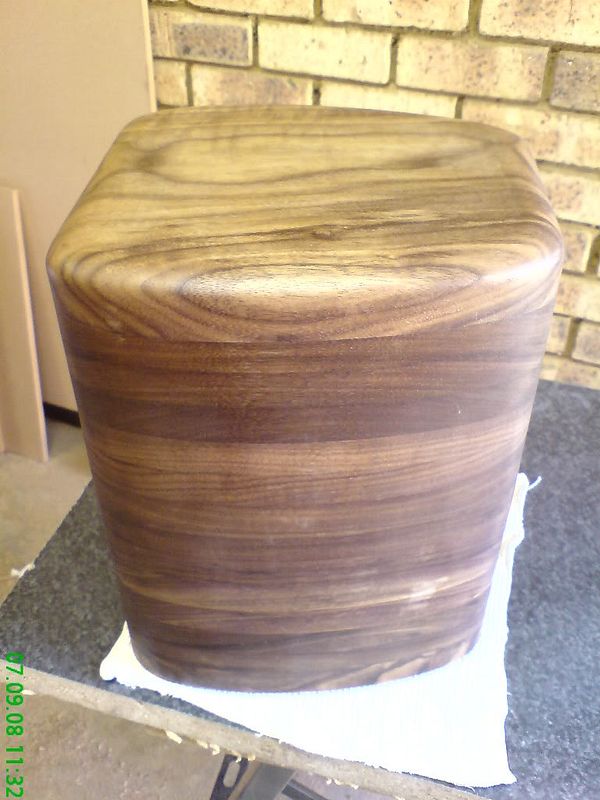
I finished the real wood parts by applying sanding sealer, sanding it down with steel wool and finally applying Nova wax sealer.
Before and after the wax:
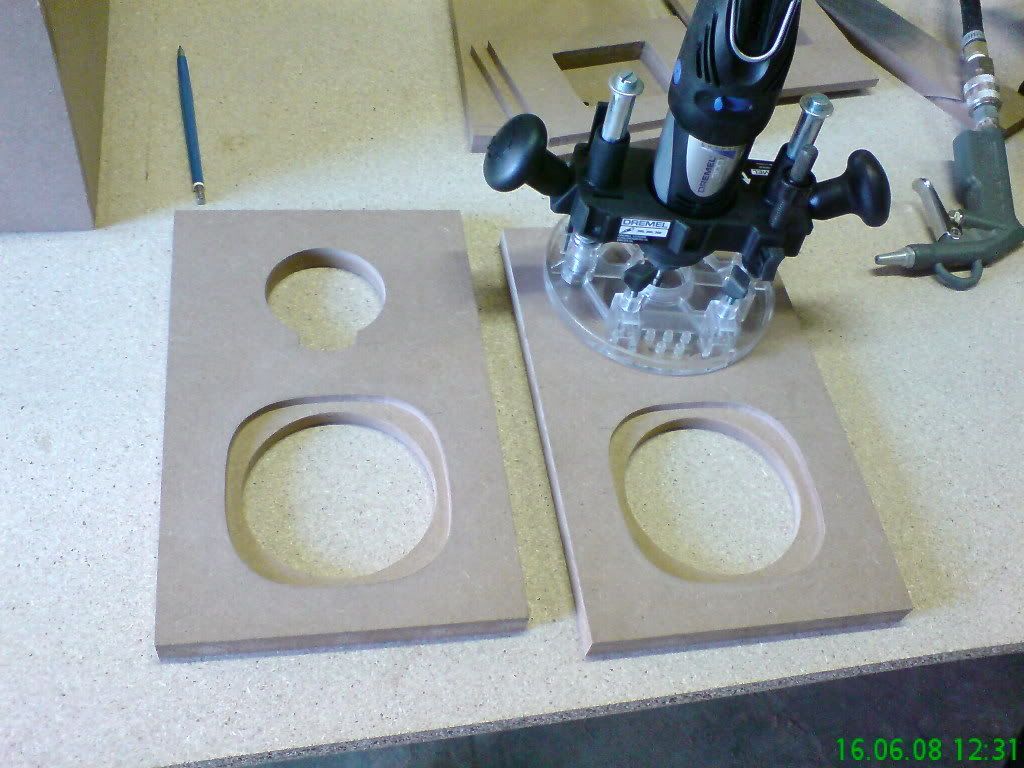
The baffles I made from 32mm MDF. I used a Dremmel with router attachment to cut out the recesses for the drivers:
I covered them with black leather. (I don't have pictures of this, sorry :-[)
And FINALLY I ended up with this:
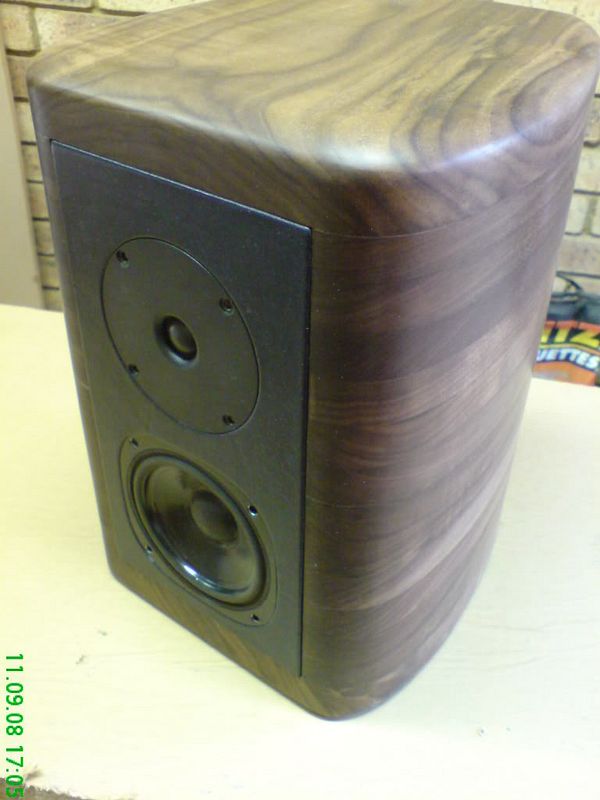
I have not done the crossovers yet. I'm using crossovers I did for my brother speakers (same drivers and box volume but different box shape).
Well, they sound very nice. Damn good actually (for me anyway ) even with crossover not their own. I am planning to do some measurements this weekend and post the results. I would appreciate input from the forum in terms of the crossover design

I bought Zaph's SR71 kit from Madisound and built test boxes (to his spec) and I must say that my little speakers sound better in particularly the midrange area than the SR71s. Granted, the SR71s need some more time to settle down, but I doubt whether they will out perform the little ones in the midrange area. Bear in mind that my crossovers aren't done yet, so I am confident that I can only do better. What I am glad about though is that the two match up very nicely i.t.o. of timbre and voicing. I'm confident I'd be able to get them even closer. OBVIOUSLY the SR71s have LOADS more bass than the small ones, but my sub is filling in for them... The imaging of the small ones is very good.
Anyway, enough for now. I will keep you updated with my progress.
Cheers.
I have a lot of pictures, so I will try to keep words to the minimum.
Here are the drivers (Seas 19TNF (H225) tweeter and CA11RCY (H149) woofer):

Here's a schematic of what I had in mind i.t.o. the box shape:

Here's the what the raw walnut planks looked like (bought from Silverton Timber Merchant):

Two of the over 50 segments that had to be done:

This involved the following:
1. Cut the walnut planks into strips
2. Cut the strips into blocks of 255 x 60 x 22mm
3. Trace the shape of the segment from the router template (cut from 16mm MDF)
4. Roughly cut away excess wood on the band saw
5. Attach the router template to the roughly cut segment
6. Router segment to shape going WITH the grain (here-in lies the story of R110 in school fees :
7. Attach the template to the other side of the partly shaped segment and router the rest into shape
8. Repeat 50 times
These are SOME of the segments from the side:

Once all segments were done I drilled holes for the 3 10mm dowels that would (I hoped really hard for this) align the segments when gluing.
Here's the jig that I used to drill the holes for the dowels, for one end of the segments only. I had 2 other jig inlays for the other two holes.

As is turned out, this trick didn't work well. Firstly, the holes did not align properly when the segments were stacked against each other. My drill jig was obviously not accurate enough (yeah, blame the tools!), or I wasn't careful enough. In the end I had to clamp the segments together - only 6 at a time - and ream the holes until the dowels fitted.
That done, it was time for gluing:

I glued only six segments together at a time. I made very sure I covered the entire surface of the segment to ensure a good bond. Now, here's the biggest lesson I learned through this exercise: do not use quick set wood glue when you have to glue many pieces together. In fact I wouldn't use the long dowel trick again. I'd rather use short dowels like these:

They work like this: first you drill the holes in one segment, insert the metal spikes, lay the next segment over the spikes and align it properly then lightly hit it with your palm/rubber mallet so that the spikes make marks in the top segment. And there you have perfect indicators of where to drill the holes. It works brilliantly
Once the first 6 segments were glued, I did the other 6 ending up with 12 segments that would form one side panel.
After A LOT OF SANDING I ended up with this:

I now had to cut slots for the baffles (front and back). I made sure I had two parallel surfaces on the inside of the segments for this purpose. The schematic below shows what I had in mind:

Here's the real thing:

And the end result:

The top and bottom of the boxes I made from solid 32mm walnut. I had to "plane" some irregularities out of these, but I don't have a planer/thicknesser so I used this trick:

Attach two guide planks on the sides of the walnut plank and run it over (and over and over and over...) the router table. I'm sure you can figure out what I did. It worked quite well.
I used the short dowel/spike trick mentioned above to glue the tops and bottoms to the side walls. I first cut away the excess wood again and after gluing them to the side walls used a laminate trimmer bit to shape them to the side walls and baffles. I gave the bottom a 5mm round over and the top table edge profile.
I finished the real wood parts by applying sanding sealer, sanding it down with steel wool and finally applying Nova wax sealer.
Before and after the wax:


The baffles I made from 32mm MDF. I used a Dremmel with router attachment to cut out the recesses for the drivers:

I covered them with black leather. (I don't have pictures of this, sorry :-[)
And FINALLY I ended up with this:

I have not done the crossovers yet. I'm using crossovers I did for my brother speakers (same drivers and box volume but different box shape).
Well, they sound very nice. Damn good actually (for me anyway
I bought Zaph's SR71 kit from Madisound and built test boxes (to his spec) and I must say that my little speakers sound better in particularly the midrange area than the SR71s. Granted, the SR71s need some more time to settle down, but I doubt whether they will out perform the little ones in the midrange area. Bear in mind that my crossovers aren't done yet, so I am confident that I can only do better. What I am glad about though is that the two match up very nicely i.t.o. of timbre and voicing. I'm confident I'd be able to get them even closer. OBVIOUSLY the SR71s have LOADS more bass than the small ones, but my sub is filling in for them... The imaging of the small ones is very good.
Anyway, enough for now. I will keep you updated with my progress.
Cheers.


