Hi all solderslingers
I use point to point wiring in most of my electronic projects, and have seen many examples of the art through my years as an service technician. Still, for many enthusiasts of DIY audio, it is a foreign concept. With the dominance of printed circuit boards and surface mount technology, I guess this is no surprise.
Regardsless, it is still one of the best ways to quickly construct a proto type (no time consuming pcb manufacture needed), and some audiophiles tout the method as superior to printed boards! Some top of the line tube amplifiers use point to point construction throughout in this day and age, for example Cary Audio Design in this amplifier
http://www.caryaudio.com/products/classic/CAD805AE.html
For some background you can look in the wikipedia: http://en.wikipedia.org/wiki/Point-to-point_construction
For this discussion, I'm going to limit myself to an example which has many applications, and the ideas can be applied to other soldering challenges. After all, even in a modern mass produced electronic product, there is places where point to point wiring is applied.
OK... let's get on with it. I suggest we use a tag strip like this
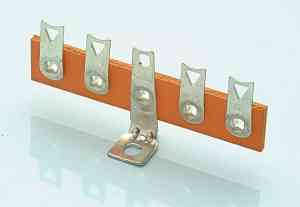
mounted directly to the mounting screw of the tube socket. On you typical tube socket

You have two mounting screws; one on each side. This allows you (with the tagstrip example above) to have 8 insulated connecting points arranged around the socket; like in this example
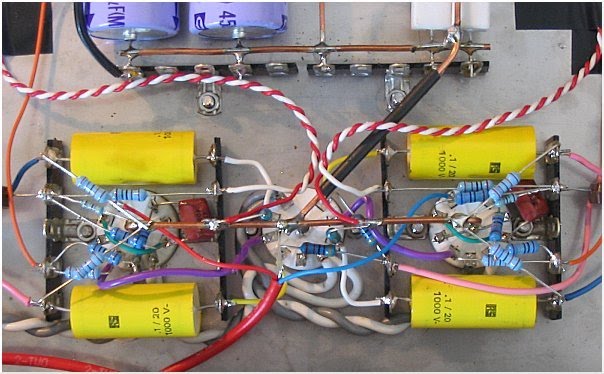
This is usually adequite for most projects, especially when the earth rail runs above the centers of the tube sockets. All your earths can be directly connected to the copper bar, and the 8 lugs on the terminal strips can be used for signal and power supply mounting points.
I'll be back soon...
I use point to point wiring in most of my electronic projects, and have seen many examples of the art through my years as an service technician. Still, for many enthusiasts of DIY audio, it is a foreign concept. With the dominance of printed circuit boards and surface mount technology, I guess this is no surprise.
Regardsless, it is still one of the best ways to quickly construct a proto type (no time consuming pcb manufacture needed), and some audiophiles tout the method as superior to printed boards! Some top of the line tube amplifiers use point to point construction throughout in this day and age, for example Cary Audio Design in this amplifier
http://www.caryaudio.com/products/classic/CAD805AE.html
For some background you can look in the wikipedia: http://en.wikipedia.org/wiki/Point-to-point_construction
For this discussion, I'm going to limit myself to an example which has many applications, and the ideas can be applied to other soldering challenges. After all, even in a modern mass produced electronic product, there is places where point to point wiring is applied.
OK... let's get on with it. I suggest we use a tag strip like this
mounted directly to the mounting screw of the tube socket. On you typical tube socket
You have two mounting screws; one on each side. This allows you (with the tagstrip example above) to have 8 insulated connecting points arranged around the socket; like in this example
This is usually adequite for most projects, especially when the earth rail runs above the centers of the tube sockets. All your earths can be directly connected to the copper bar, and the 8 lugs on the terminal strips can be used for signal and power supply mounting points.
I'll be back soon...